The story of the High Performance Engine
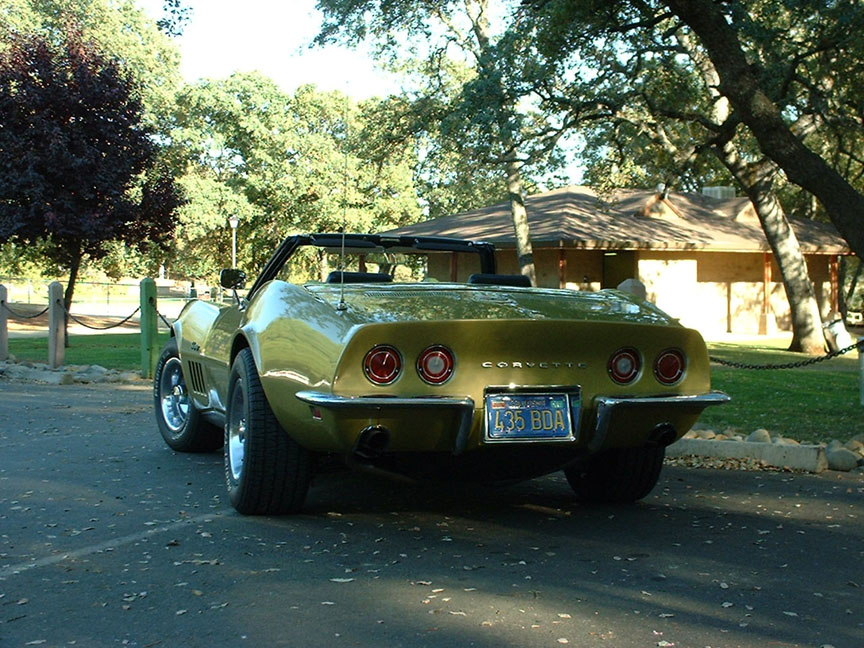
After I bought the 1986 Corvette, I wanted to improve the 69 Vette's engine. The original 350/300 engine had 130,000 miles on it with no internal work done except for replacing the timing chain and gear after a section of nylon teeth on the timing gear broke off. In addition to being tired, the engine's 10.25:1 compression ratio made the gasoline available in the late eighties unsuitable. When up to normal operating temperature, the engine would ping badly under even a light load, with the best gasoline readily available.
I talked to the folks at Rigsby Crankshaft (now Sheldust) in Pacheco, CA about adding some performance to the engine. Art, husband of a lady I worked with, said if I wanted to build a stout, streetable motor, I should start with another block. The reason is that all Corvettes have the Vehicle Identification Number (VIN) stamped on the machined surface on front of the block. If I were to blueprint the stock motor, the numbers would be obliterated, lessening the value of the car to any serious Corvette enthusiast.
Since another block would be fairly easy and inexpensive to obtain, that was what I did. I wanted a "4 bolt main" block, because all Corvette motors had them, and while the additional strength was not absolutely necessary for the motor I was building, it was the right thing to do. I scrounged around the wrecks at Martinez Auto Dismantlers (now defunct) until I found a four bolt block in a Chevy van - with the same casting number as the original, 3970010, a real plus! One of the wrecking yard workers raised the van on a fork lift, and cut the motor mounts out with a "fire ax". The block dropped free and I was on my way.
The folks at Rigsby then did their magic:
- cleaned and stripped the block,
- “decked” and squared the block, which means the head surfaces are made square with the main journals and at 90° to each other – this is the process that would have removed the all important factory stamped numbers on the original block.
- line honed the main bearing bores so they are straight and true
- deburred all oil drain back holes
- bored it .030 over, brings the displacement up to 355 cubic inchs
- painted the block inside and out with Glyptal®, a special oil resistant paint
- crank was checked and trued, journals turned 0.010" undersize, rear flange trued
- the rods checked for straightness and straightened where needed, resized, and shotpeened
- the entire rotating and reciprocating assembly was balanced, including the new harmonic balancer, the refinished flywheel and a new clutch assembly
- forged pistons, were cut to hold compression to 9.6:1 so modern gasoline will not readily detonate
- a fairly mild hydraulic Corvette L-79 350/350 type cam was installed, driven by a true double row roller chain
While the block work was progressing, I was collecting the new parts I would need to complete the engine:
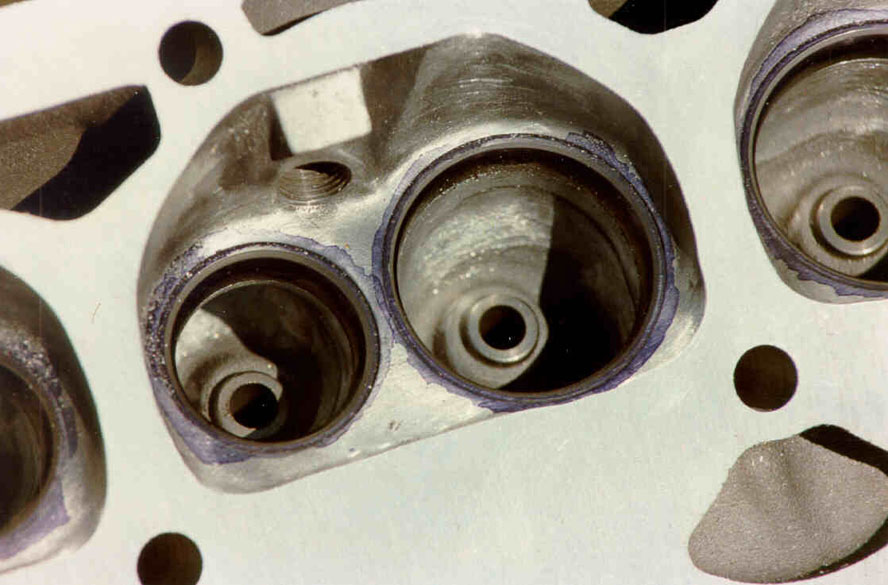
- 1987 Corvette cylinder heads
- Crower stainless roller rocker arms
- ARP heavy duty screw in rocker studs
- 600 cfm Holly 4150 double pumper carb
- LT-1 aluminum high rise intake manifold
- LT1 harmonic balancer
- LT-1 six quart oil pan
- Chevrolet aluminum water pump
- Hooker four tube headers
The heads and intake manifold went to Granny at Air Flow Technology, who did the head work using a flow bench. Granny did a 3 angle valve job, cleaned up the ports and matched the intake manifold ports to those in the head, to help the motor breathe. And breathe it does!
Once I had all the parts and the block was complete, I assembled the top-end of the motor and put it in the car.
Of course, it was not as easy as just saying it. For instance, the aluminum water pump was slightly longer than the old one, so I had to make a spacer to move the pulleys on the harmonic damper out enough for the fan belts to align. I fabricated the stainless steel tubing I used for the positive crankcase ventilation system, and for the fuel lines.
The cast magnesium valve covers had oil drip protrusions that interfered with the rocker arms, so I ground them all off with a stone in my electric dril.
I drove it about 1,000 miles and parked it for 13 years while I went out and played with CBX motorcycles.
13 years later, I began the process of getting the old boy back on the road. It runs much better now, but I had to clean the carb, because it had dirt in the needle & seat - fuel was dumping down the secondaries at idle. That fixed it - it doesn't run nearly as rich as it first did 13 years ago. At the same time, I also changed the 65 power valve to a 75 to see if that made a difference. I may go back to the original 65 so the power valve opens at a lower vacuum, perhaps giving a little better fuel mileage. In 2011 when I tore the carb apart in an attempt to determine the problem I was having with the engine cutting out, I installed the original 65 power valve. Here is a Link to a Holley Video explaining how's and why's of power valves.
In the spring of 2004, I put on new B.F.Goodrich Radial T/A tires - the old Goodyear Eagles had flatspotted pretty badly after sitting all those years - and had the seats redone with new covers and foam - they look and feel like new!
In 2005 I had the front suspension rebuilt with new bushings, ball
joints, tie-rod ends, idler arm, sway-bar bushings and links, and a new
steering box.
Then I had the rear suspension rebuilt with new trailing arm bushings, and
wheel bearings, new strut rods, and a single leaf composite rear spring.
After a four-wheel alignment, it seems to ride and handle like it did when
it was new - better in fact, because when it was new it had crummy bias-ply
tires.
Then I replaced the original exhaust with a chambered 2.5 inch system
that was very, very loud and fun to drive - the chambers were like those on the RPO side pipe exhaust. I can't believe those sounded as loud as this
system does. Maturity finally caught up with me and I had a couple of Magnaflow
stainless steel mufflers put in the stock location in the rear fenders.
It sounds much better, not stock quiet, but mellow with a snarl when I
get on the loud pedal.
I installed a Breakerless electronic ignition conversion kit in the distributor to eliminate the points and condenser. Link to One Wire Ignition Conversion Kit. Then I had the distributor checked for any issues, and the advance calibrated to the engine by Dave Westgate who does Corvette Mechanical Repairs 1953 thru 1982. It came out like this:
|
Mechanical Advance |
|||
| OLD |
NEW |
||
| 0° | 1,400rpm | 0° | 1,100rpm |
| 13° | 3,700rpm | 13° | 3,200rpm |
|
Vacuum Advance |
|||
| OLD | NEW | ||
| 0° | 12½" | 0° | 8" |
| 11½° | 22" | 7° | 11" |
|
Degrees of distributor rotation. Double for
crank. Inches of Mercury - InHg. Engine vacuum at idle = 15" @ 1,200' elev. |
|||
With an initial setting of 10° I now have 36° at the
recommended 3,200 rpm. The mechanical advance now begins sooner than
before and reaches
the maximum at a lower rpm. I have full vacuum
advance of 14° (at the crank) at idle, which the engine really likes.
These changes in the advance curve really made the engine stand up and perform
to its potential.
I'm trying to think up my next project on this never ending quest to
make this car just how I want it.
It's ready for show and go! I think the go part is nicely taken care of...
Photos of the engine swap and build
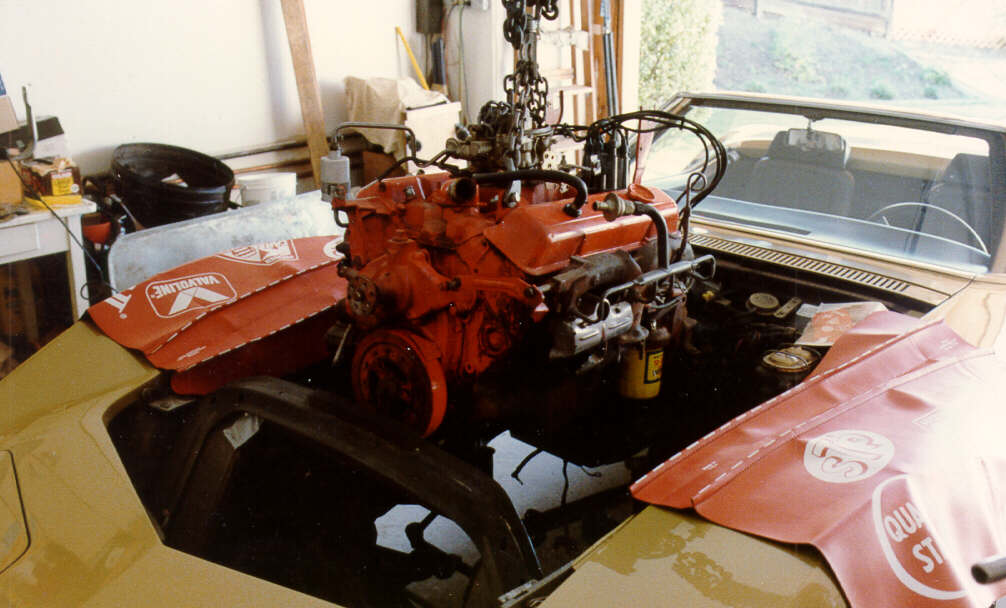
Out with the old
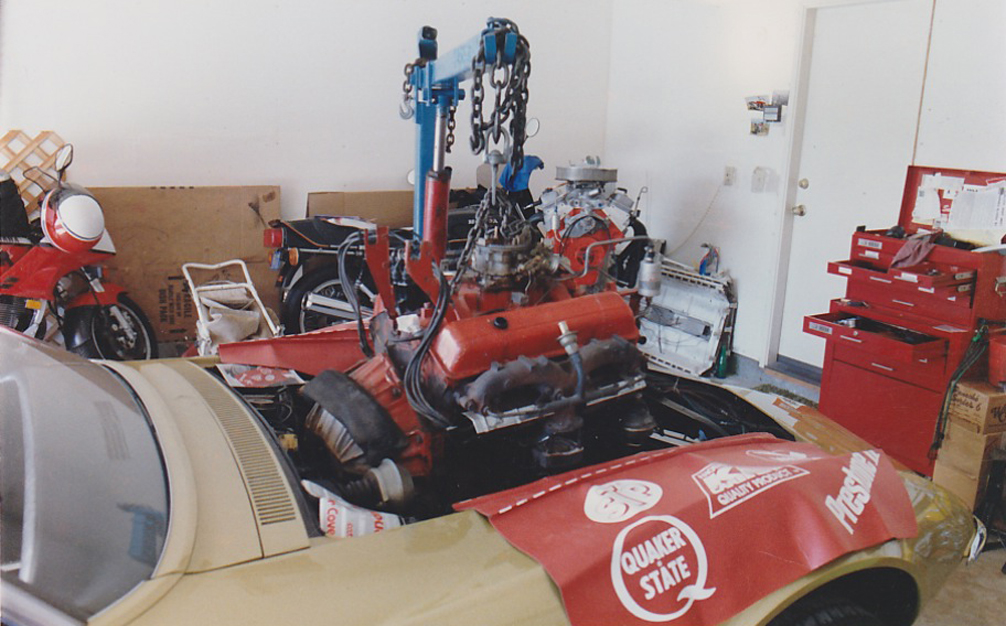
Out with the old from the passenger side, tranny stayed in the car.
Motorcycles resting.
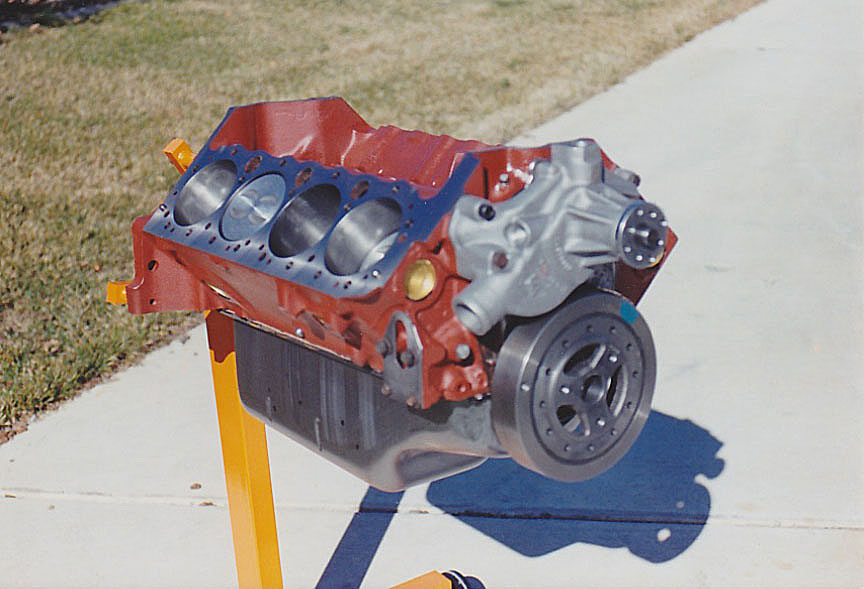
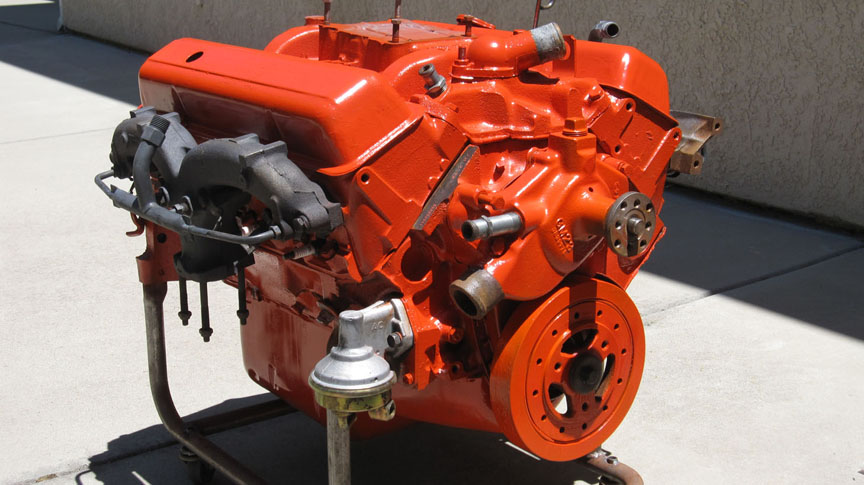
Freshly decked, squared, line honed, and bored block with aluminum water pump, LT1 harmonic balancer
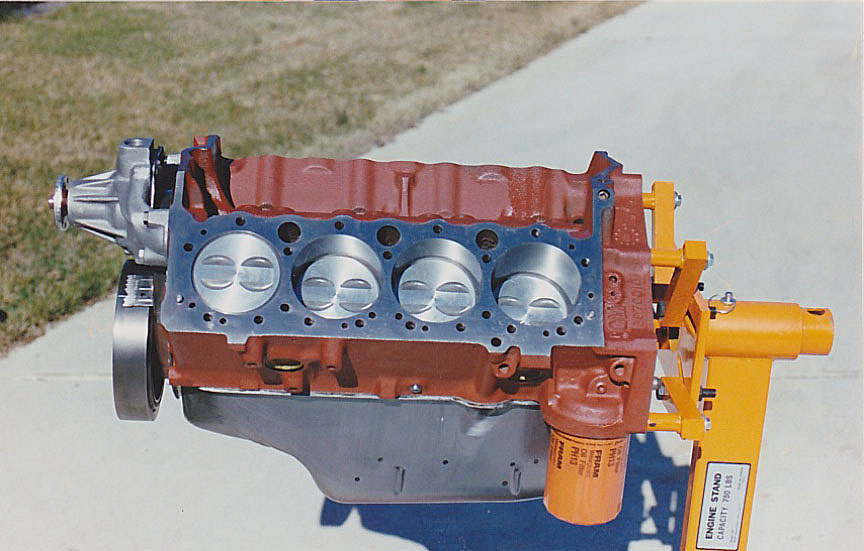
Forget pistons, HD oil filter
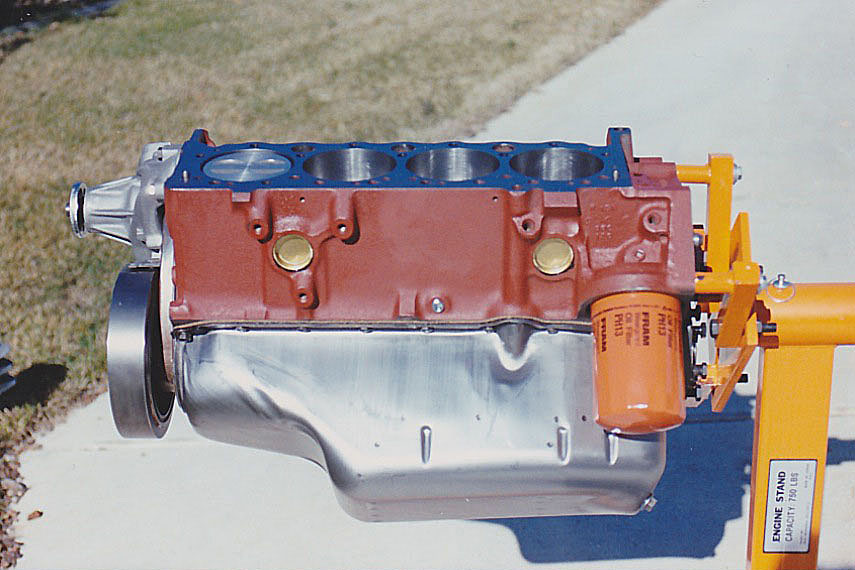
LT1 Oil pan, brass freeze plugs -
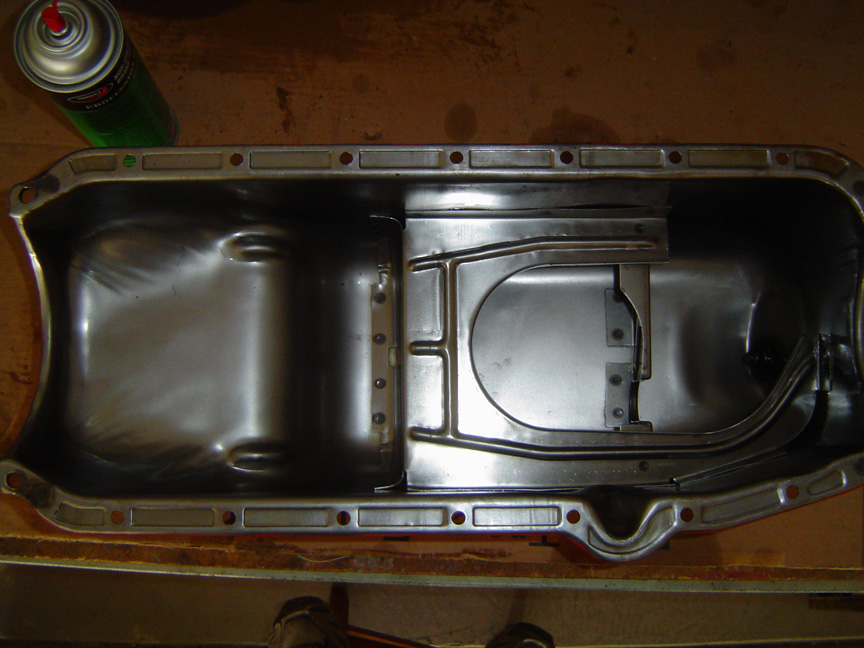
Interior of the LT1 oil pan showing the "protected" area where the pump
pickup sits
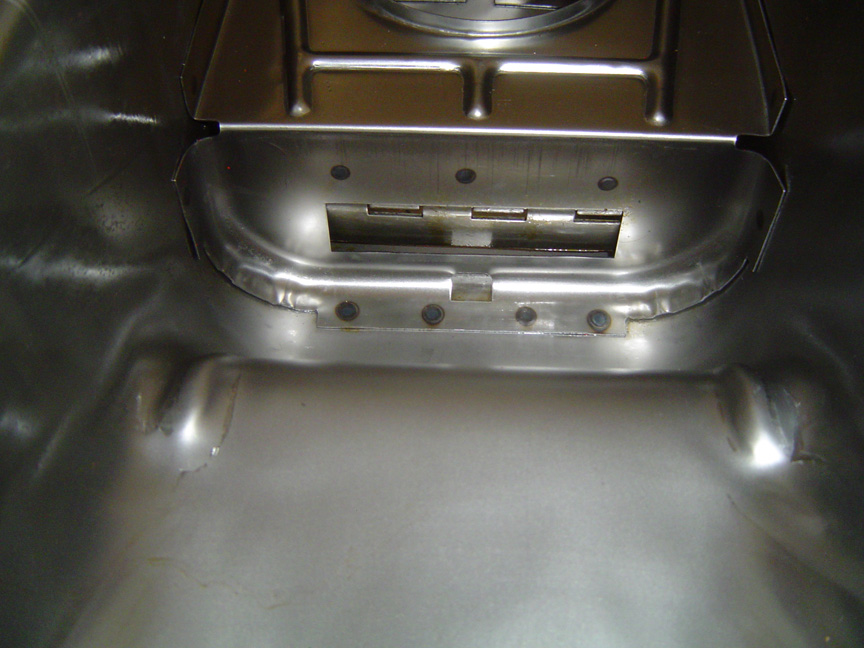
Swinging door that keeps oil from flowing forward during braking, keeping
oil around the pickup
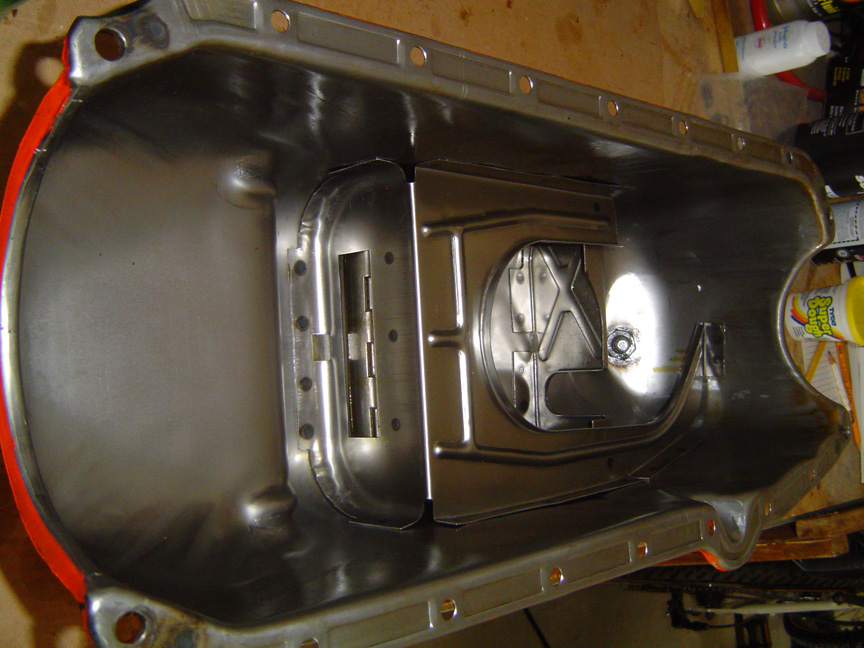
Another view of the oil pan baffling

True Roller timing chain
Chamfered oil drain back
Forged piston - 9.6:1 CR
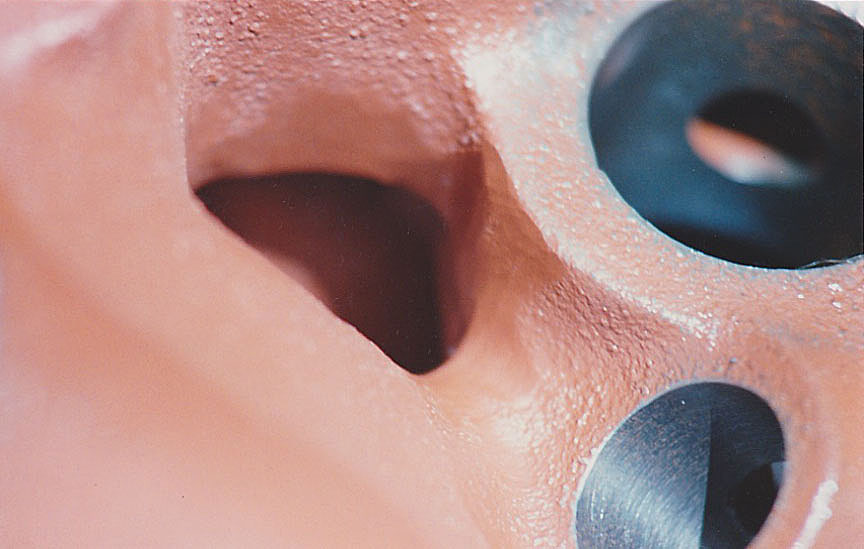
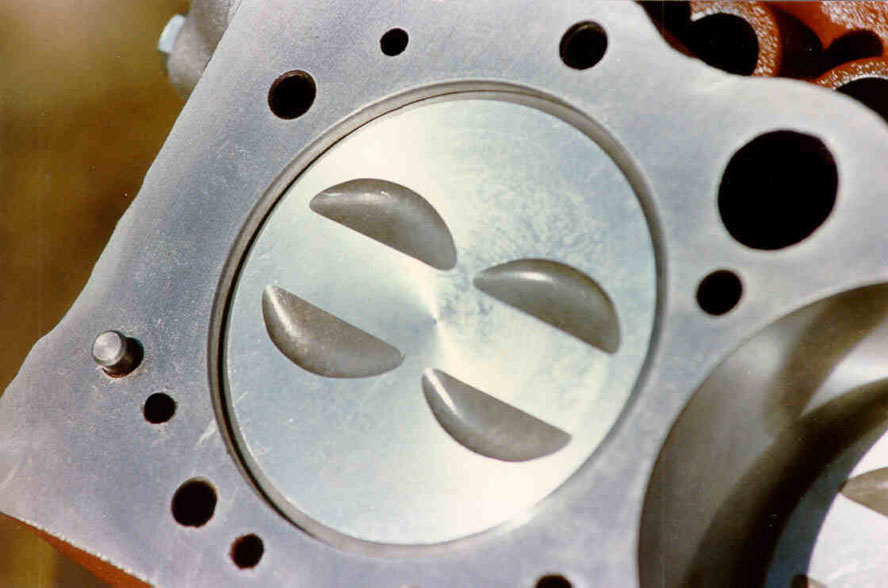
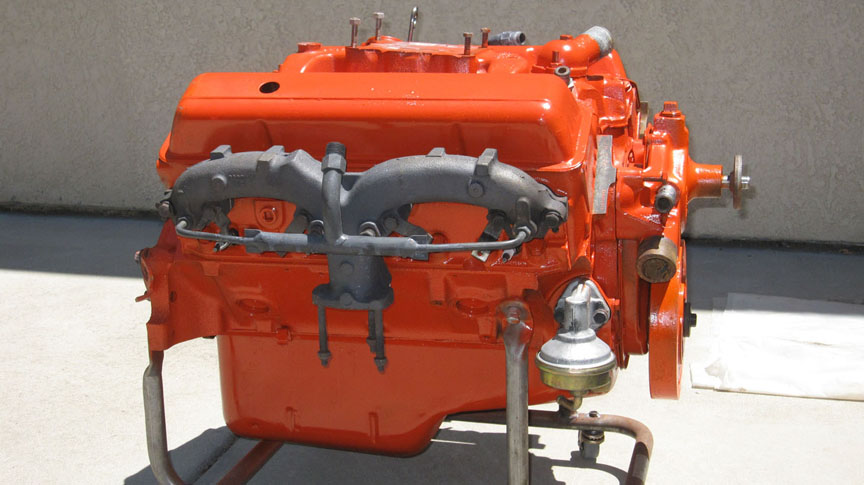
3 Angle valve job and pocket porting

Cam specs

ARP Heavy Duty rocker stud on left, stock Corvette on right
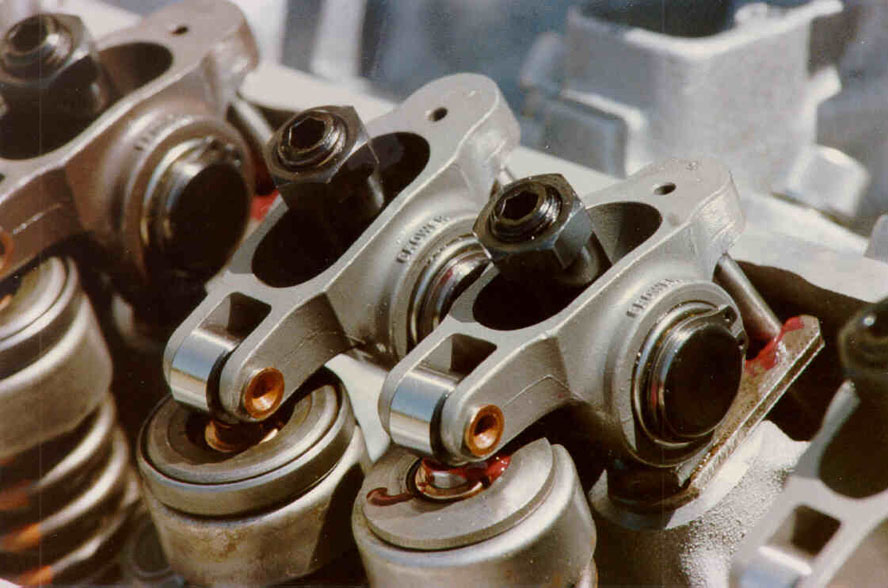
Crower Stainless Steel roller rockers - overkill but why not
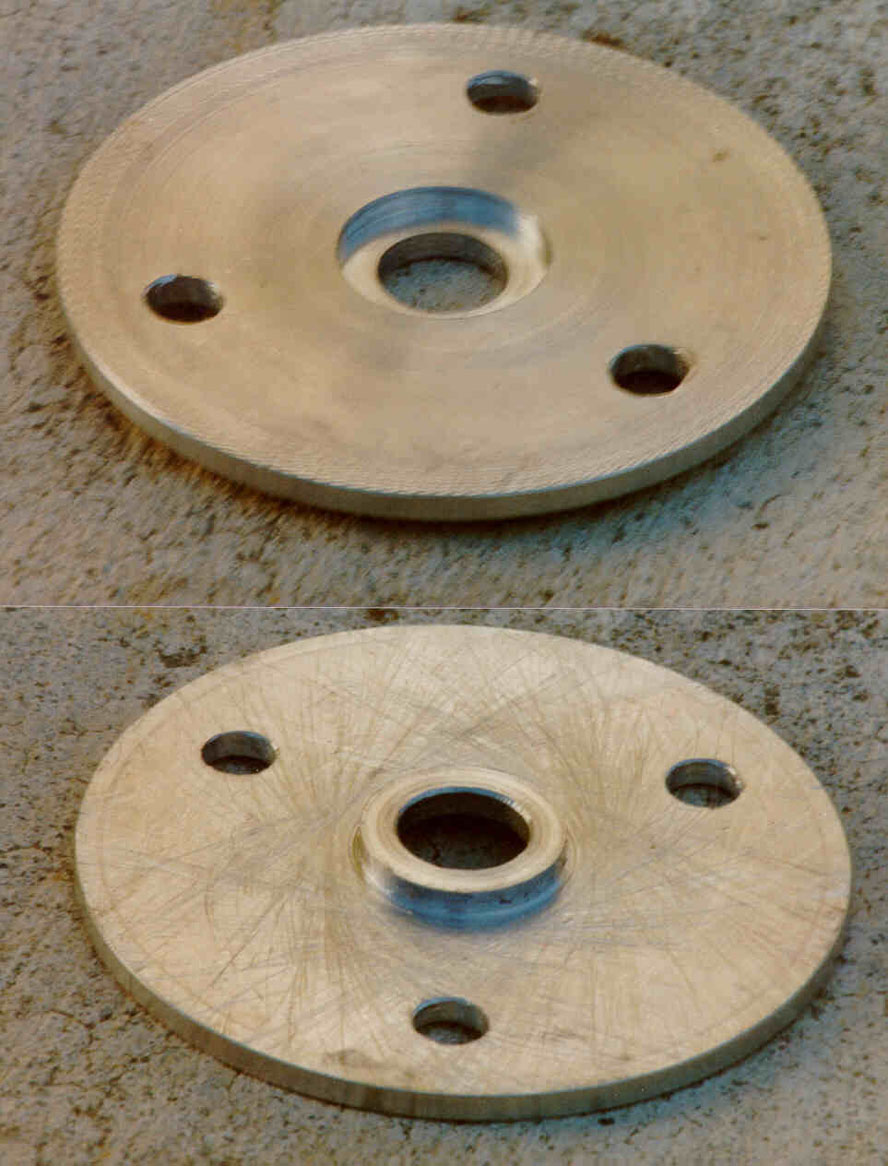
Pulley adapter front and back
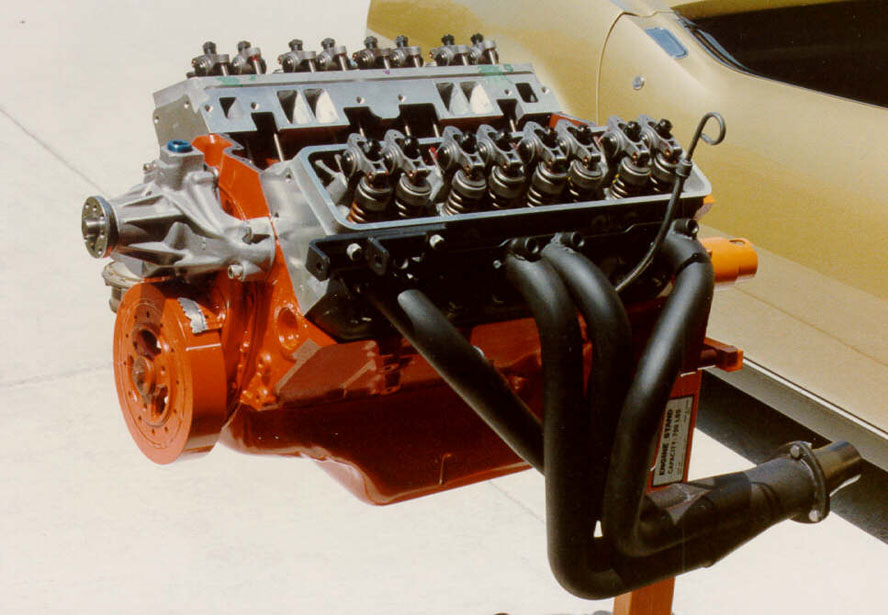
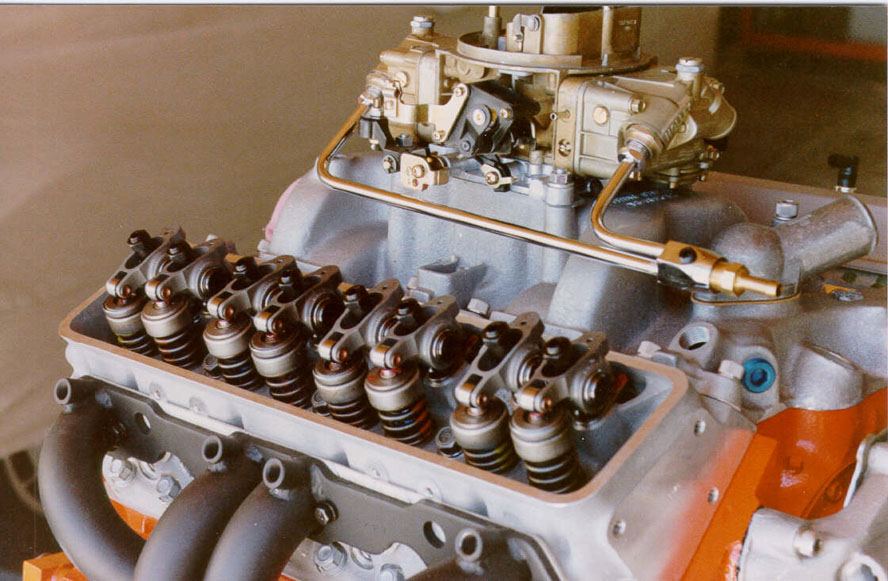
Roller rockers, Corvette aluminum heads & water pump, headers
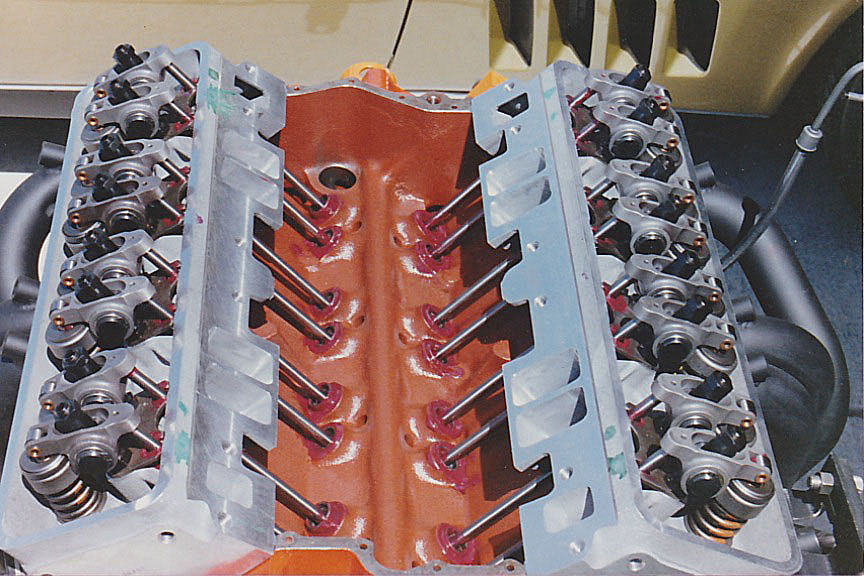
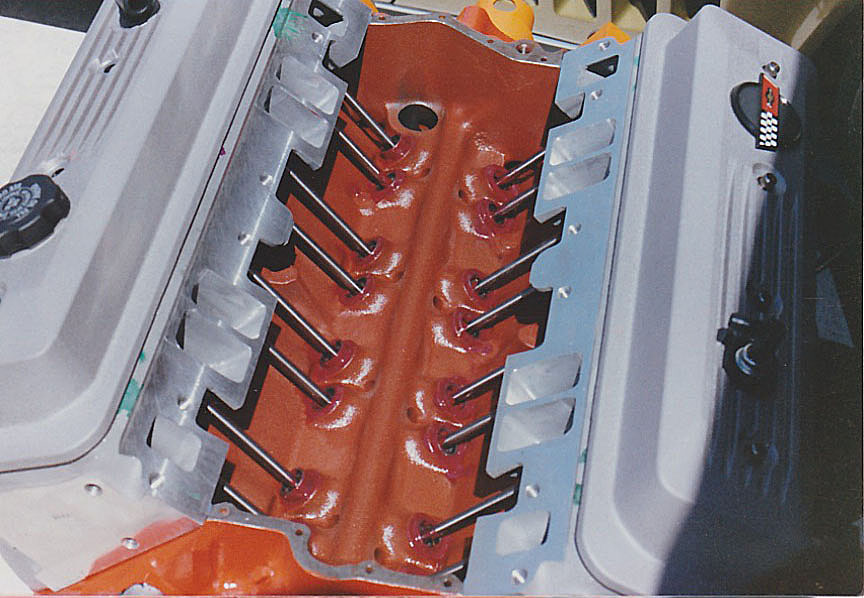
Top end view - assembly lube all over the moving parts
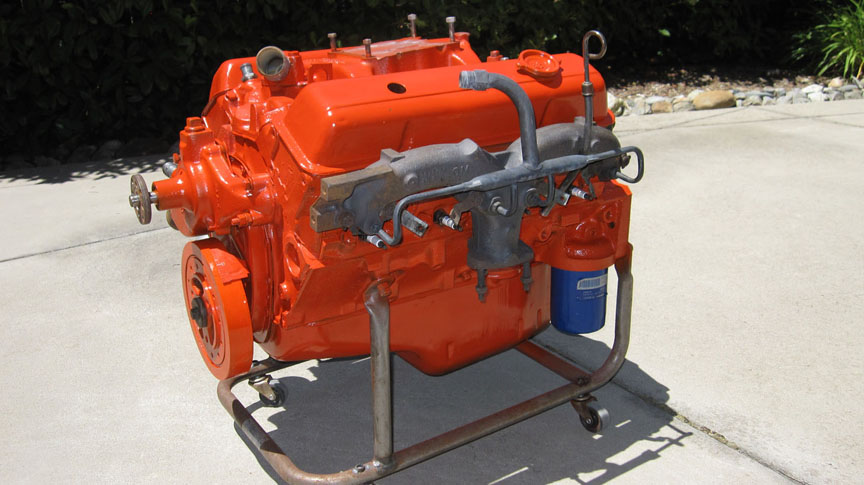
Valve covers on
Almost ready to plug it into the engine bay

Set for the road
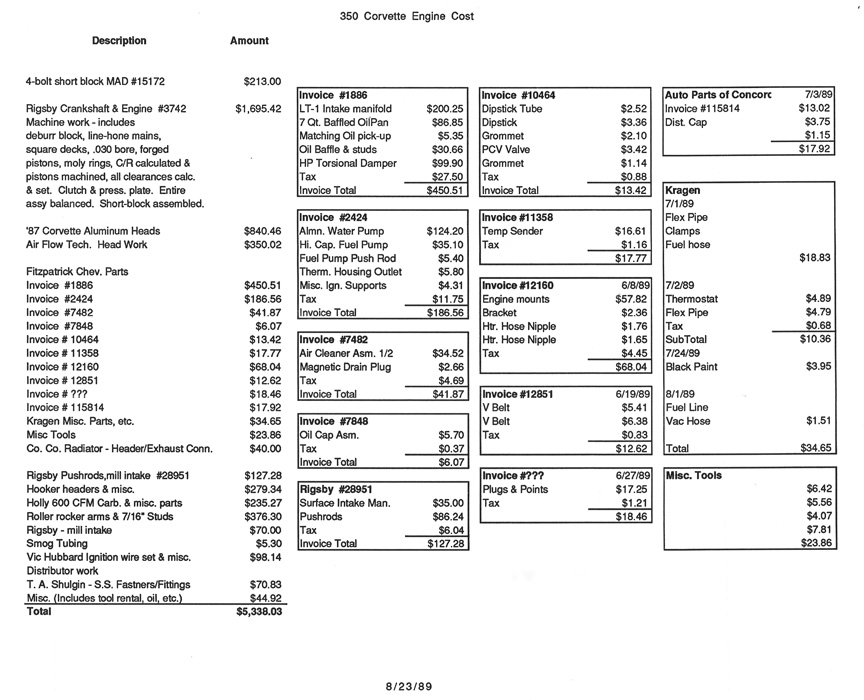
How much it cost me for this engine. Certainly crate motors were less
expensive back then,
but this engine is a lot more than a crate motor. It was built with a
specific performance goal.
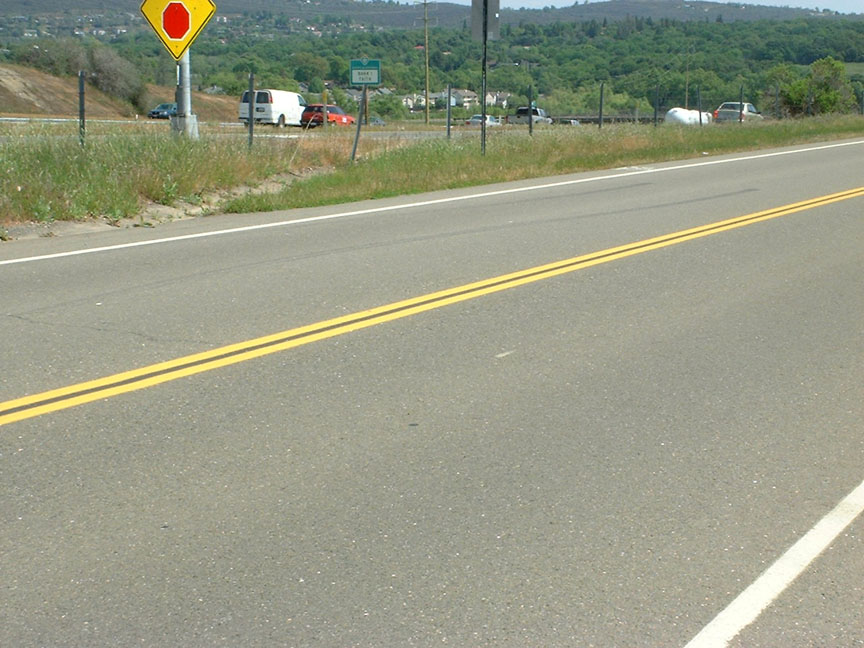
Corvette tracks -
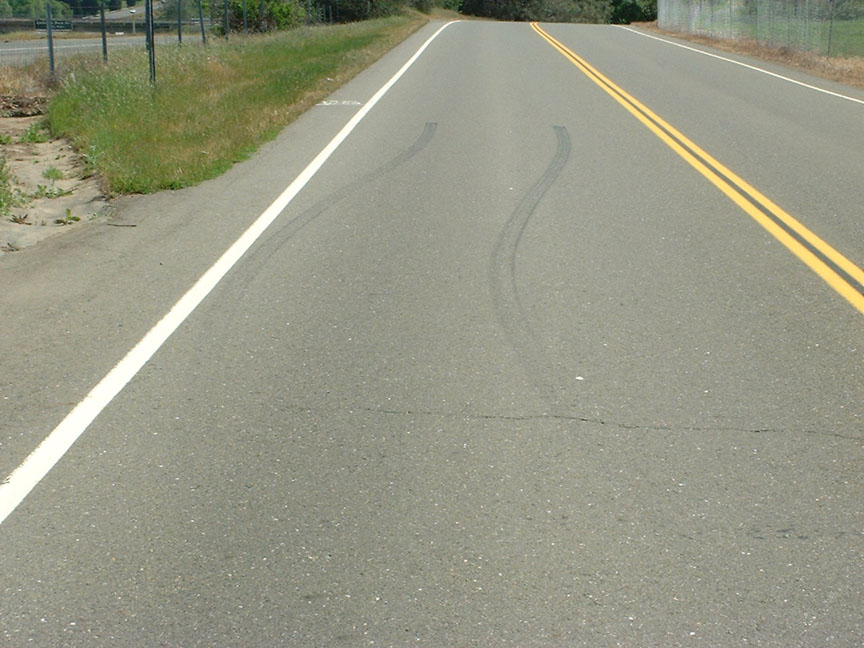
45 feet worth
You can see this end when I go by...
Original engine cleaned up and painted - it is stored in a safe place
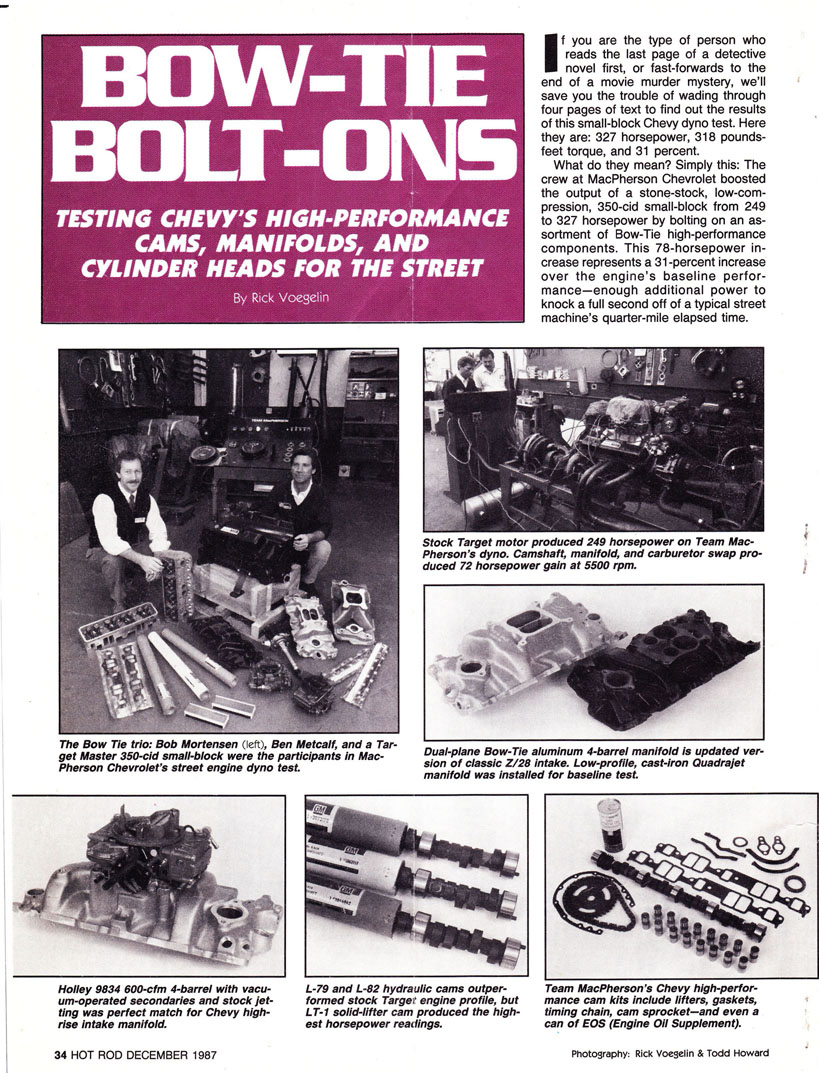
Early on in the planning process for this engine, I happened to read this article in Hot Rod magazine. Here was a relatively inexpensive way to build a brand new top-end on the block I would soon acquire. Based on the results of the dyno runs in the article, by building a similar engine, I would have a reliable, strong running Corvette engine.
Home Motorcycles XK120M Jaguar 1965 Mustang 2+2 1969 Corvette 1986 Corvette 2001 Corvette The Workhorse