Corvette!
Practically everybody who likes cars has thought about owning one.
My lucky day came in the summer of 1970 when I heard of a 2,600 mile
Corvette that was for sale at a great price. Since Corvettes
had a reputation of being expensive to insure, I checked with my
insurance agent and learned the insurance would be very little more
than my
1965 Mustang.
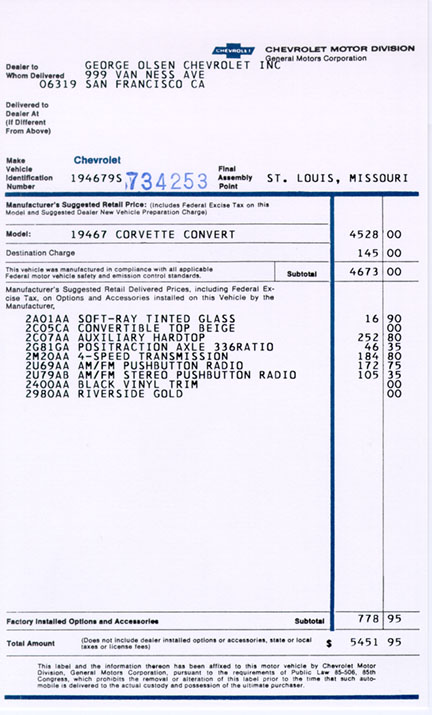
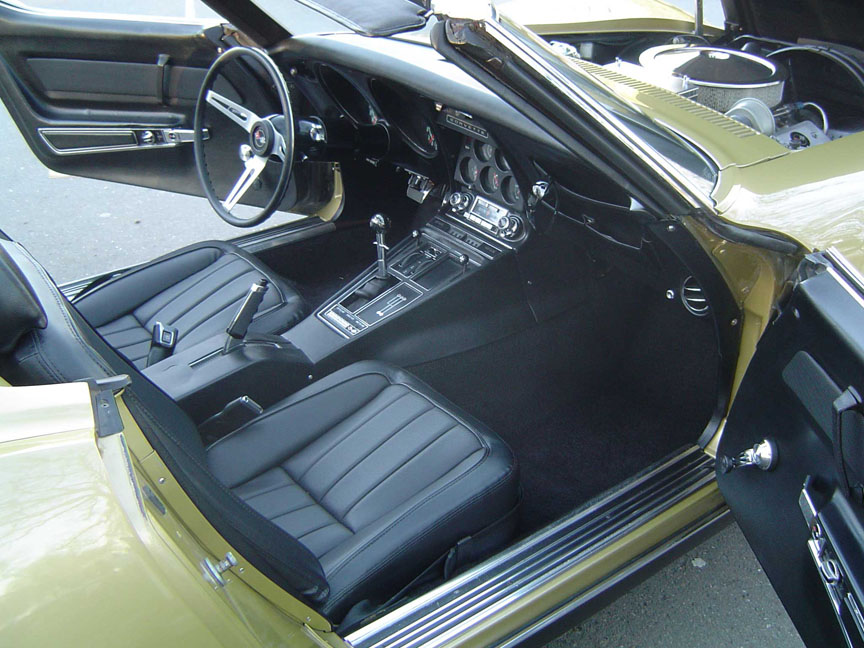
That sealed my fate and I bought the car! This is pretty much
a striped model, with the base 300 hp engine, four speed
transmission, tinted windows, AM-FM radio (big deal back then),
Posi-traction diff., and white stripe tires! No air
conditioning, no power steering, no power brakes. Now 50 years
later, it's still mine, and it looks about as good as it does in
these pictures. (continued below)
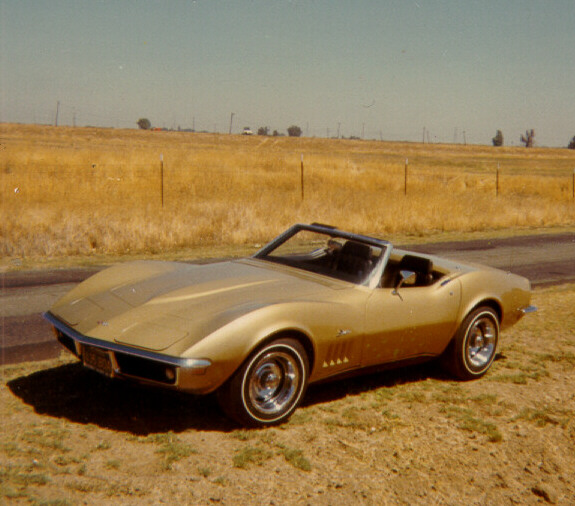
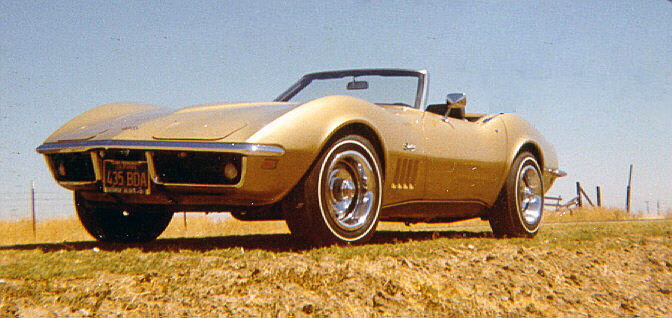
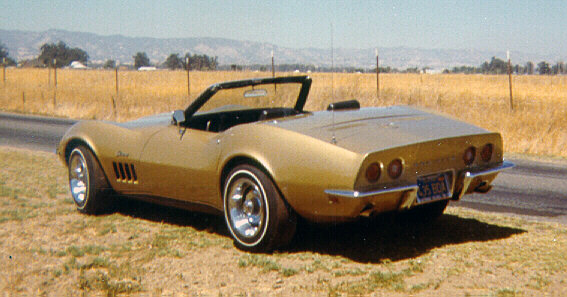
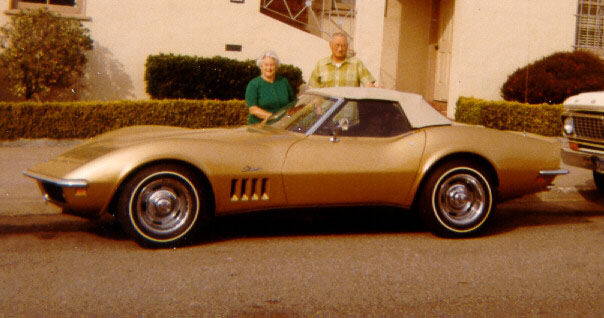
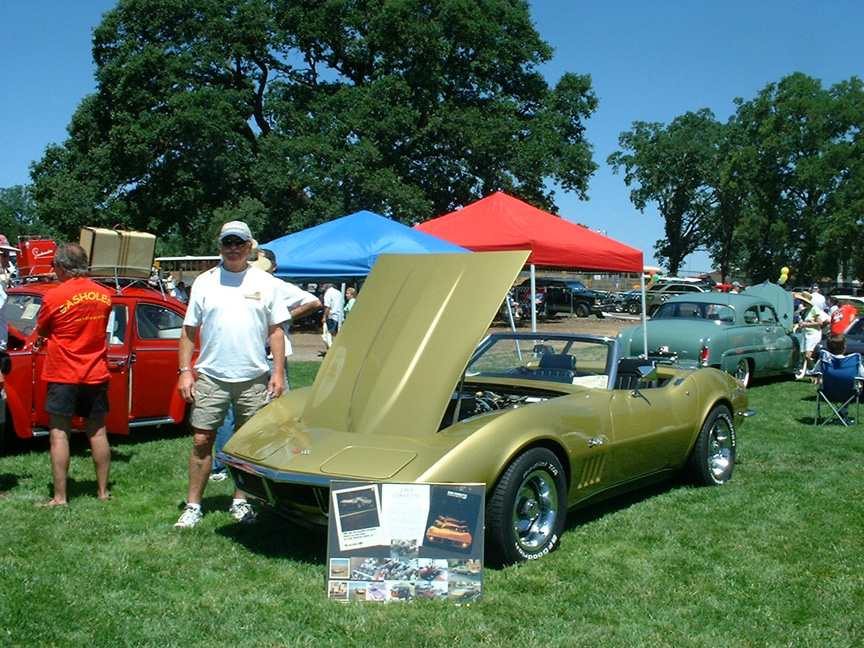
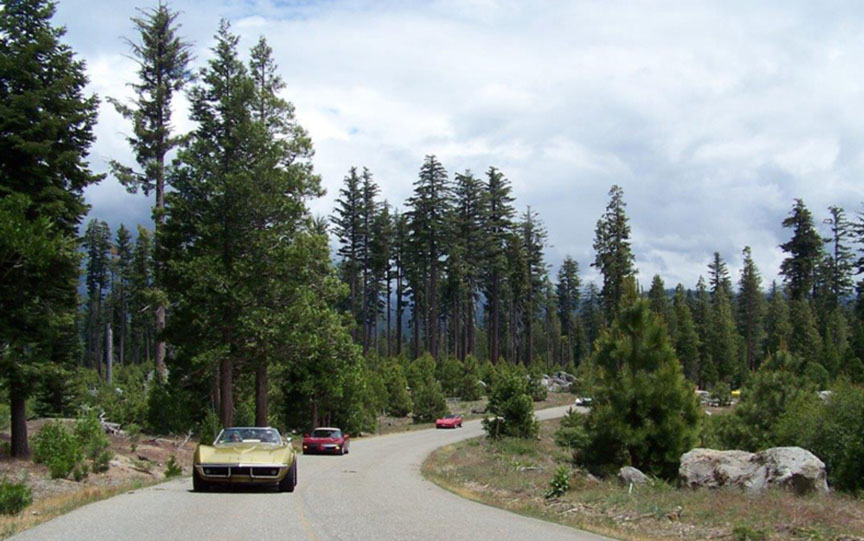
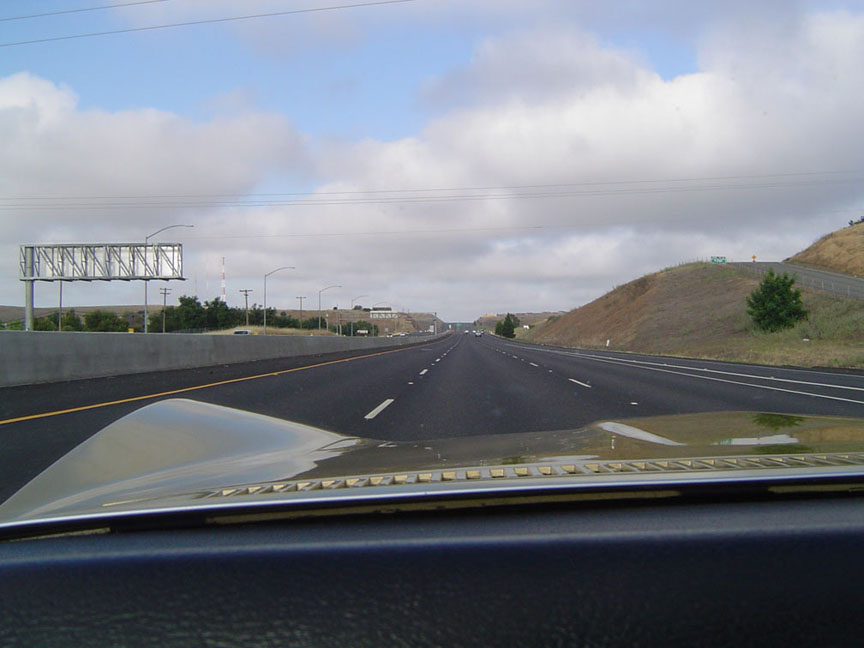
These first photos were taken near Vacaville right
after I bought the Corvette
How about those narrow white stripe tires?
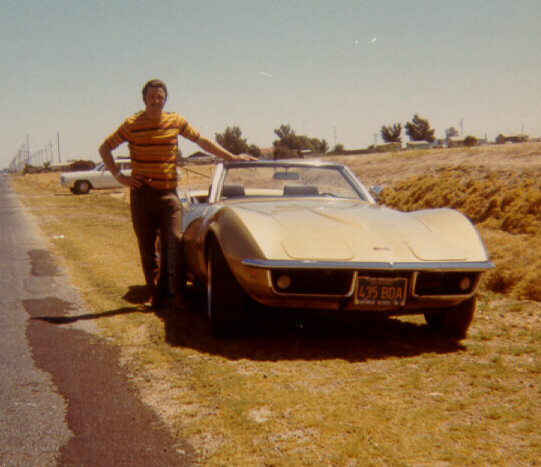
When I was young and the Corvette
was new
Convertible top up with my Aunt Edith and my
dad - I miss them both
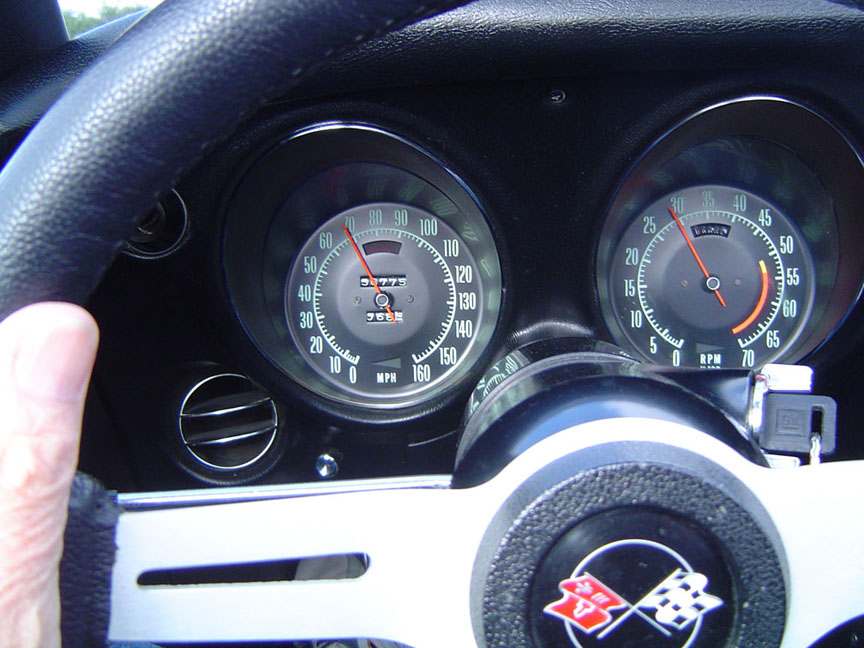
When this car was new, I drove it as fast as
it would go, just over redline in fourth gear, or about 136 mph, west
bound on I-80 west of Winnemucca, Nevada in 1971. It held the road
like a Corvette should - the only thing scary was the way I came up so
quickly on the occasional much slower moving car. One or two
encounters like that was enough for me!
The handling and overall demeanor improved significantly when I
installed radial tires and Koni shock absorbers. The only other
"performance" modification I made in the early years was to add a
capacitive discharge ignition. Rather than improve performance,
the CD unit prevented the deterioration of the spark plugs and points as
the miles went by. It was like always having a fresh tune-up.
In 1975, when the convertible Corvette was discontinued, I bought a
removable hardtop for this car from GM after having determined the
aftermarket tops did not have nearly the quality of the OEM top .
In 1986 I bought a new Corvette, and
then got heavily involved with CBX
motorcycles. The car was stored for 13 years
Thirteen years later, in the Spring of 2004,
my CBX buddy Eric ragged on me to get the car back on the road. He
offered to come down from Oregon and help me get it started in lieu of
us attending a CBX rally in Carson City. With my arm sufficiently
twisted, I borrowed a pre-oiler, merely a distributor with the drive
gear, points and other ignition parts removed removed. By plugging
this tool into the engine in place of the distributor and driving it
with an electric drill, the oil pump pressurized the oil system thereby
lubricating the engine prior to starting. This ensures adequate
lubrication for an engine that has been sitting for an extended time.
We drained the gas tank too. Actually Eric, using the time-honored
method of sucking on the siphon hose, ingested some good-tasting stale
gasoline and got the flow going. With fresh gas and a new battery
the engine fired right up!
Thus began the process of bringing the car out of it's long sleep.
New tires were one of the first things replaced since despite having
plenty of tread, the old ones had severely flat-spotted from being
parked so long. A lot of tinkering with the carb, the
brakes, and many small trim parts was done over the first couple of years.
In 2005 I had the front suspension rebuilt with new bushings, ball joints,
tie-rod ends, idler arm, sway-bar bushings and links, and a new steering
box.
Following the front end work, I had the rear
suspension rebuilt with new trailing arm bushings and wheel bearings, new
parking brake hardware, new strut rods, and a single leaf composite rear
spring. After a four-wheel alignment, it rides and handles like it
did when it was new. Better in fact, since modern radial tires are
so much better than those bias-ply F70/15 white stripe tires the car came
from St. Louis with. The bias ply tires would trammel, or follow
ruts or uneven pavement, much more than even the widest low profile radial
tires, and certainly much more than the "modest" 60 series radials
on the car now. The bias ply tires were also very hard to get
balanced so the car wouldn't shake at some speed.
Once the running gear was brought back I replaced the original 30+ year
old exhaust with a chambered 2.5 inch system that was killer loud and fun
to drive - the chambers were like those on the RPO side pipe exhaust.
I can't believe those sounded as loud as this system does - I think having
the headers in front of this system made it a lot louder than it would
have been with the factory exhaust manifolds. Maturity finally
caught up with me and I had a couple of Magnaflow stainless steel mufflers
put in the stock location in the rear fenders. It sounds much
better, not stock quiet, but mellow with a snarl when I get on the loud
pedal.
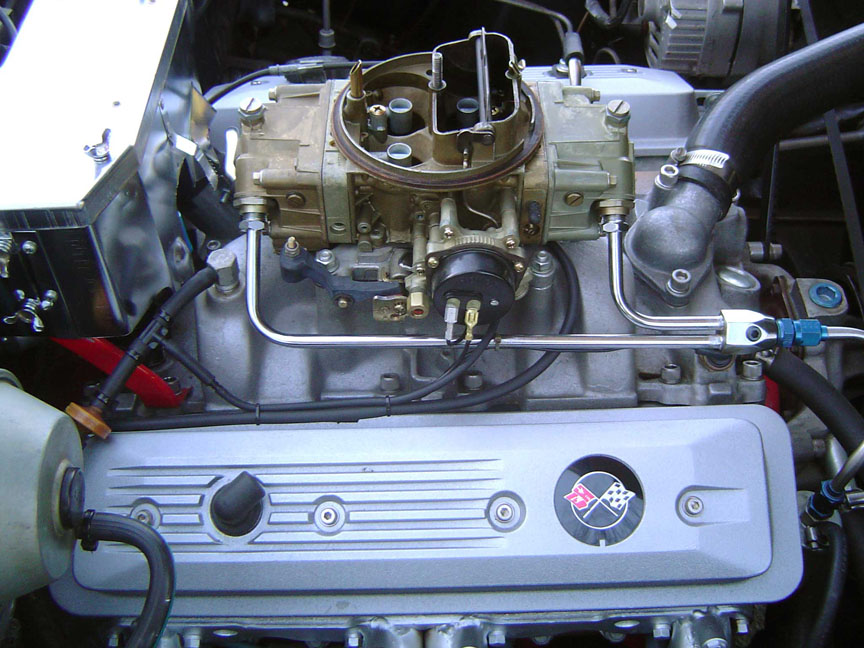
The exhaust was followed by a electronic ignition system buried in the old
points style distributor. With the points eliminated, I had Dave
Westgate re-curve the mechanical and vacuum advances in the distributor -
this made a HUGE improvement in performance, it now runs as a well built
small block Chevy V8 should! Throttle response is excellent, it has
plenty of low rpm torque, and it has great mid-range and top end
power.
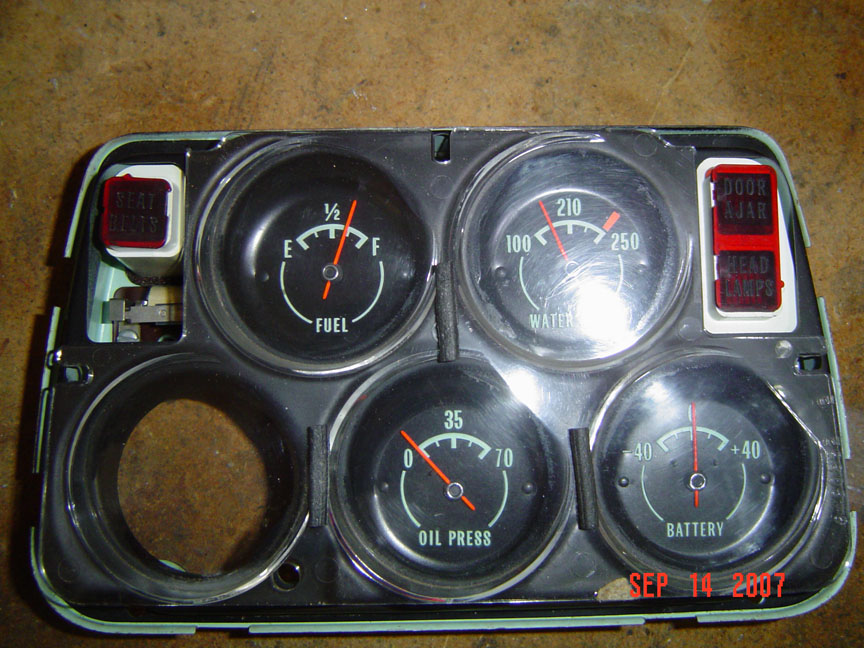
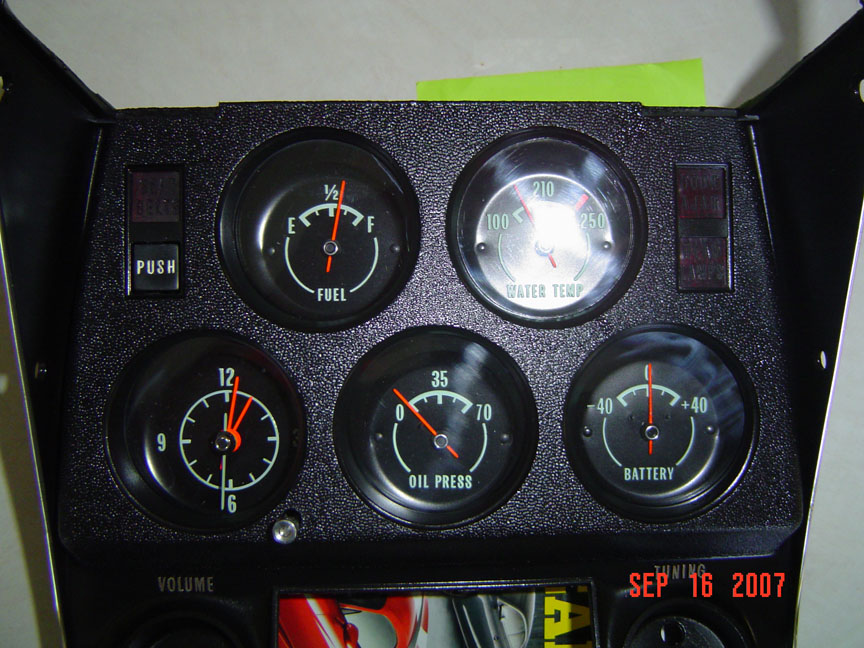
Stainless steel brake hoses and a new reproduction master cylinder (the
old one functioned perfectly, but it looked terrible - that's a good
excuse to replace a part, right?) took care of the brakes in 2008. I
also replaced the original clock that no longer worked with a quartz unit
and restored the center gage cluster "while I was at it". Oh yeah,
the other "while I was at it" involved correcting an annoying oil leak
from the engine. I heard about FelPro's one piece oil pan gasket,
since the car was up on stands what better time to replace the pan
gaskets. I'm now a true believer in this new technology.
Details are in the next section, Oil pan gasket replacement and brake
line project below.
Next I replaced the corroded chrome exhaust bezels, which can hardly be
seen unless you crane your neck under the back of the car. I was
going to replace the coolant hose clamps with OEM style Witek until I
learned the clamps on the car are original, so I won't be replacing them.
I recently uploaded this video and embedded
here to teach myself how to upload to YouTube and embed videos in web
pages.
This video was taken with an older Sony
Cyber Shot still camera.
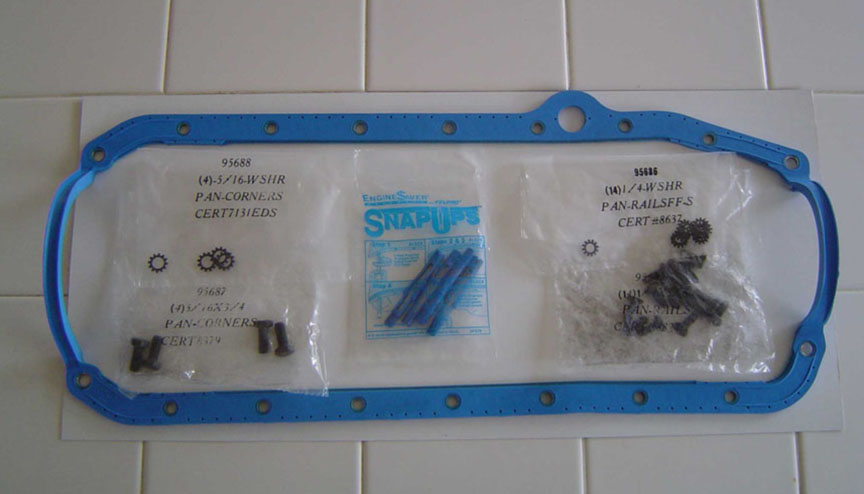
The old-fashioned cork oil pan gasket had begun to seep oil. New
on the market at the time, was the Fel-Pro one piece oil pan gasket that
includes the end pieces, and has small grommets in each bolt hole so the
bolts cannot be over tightened which would crush the gasket.
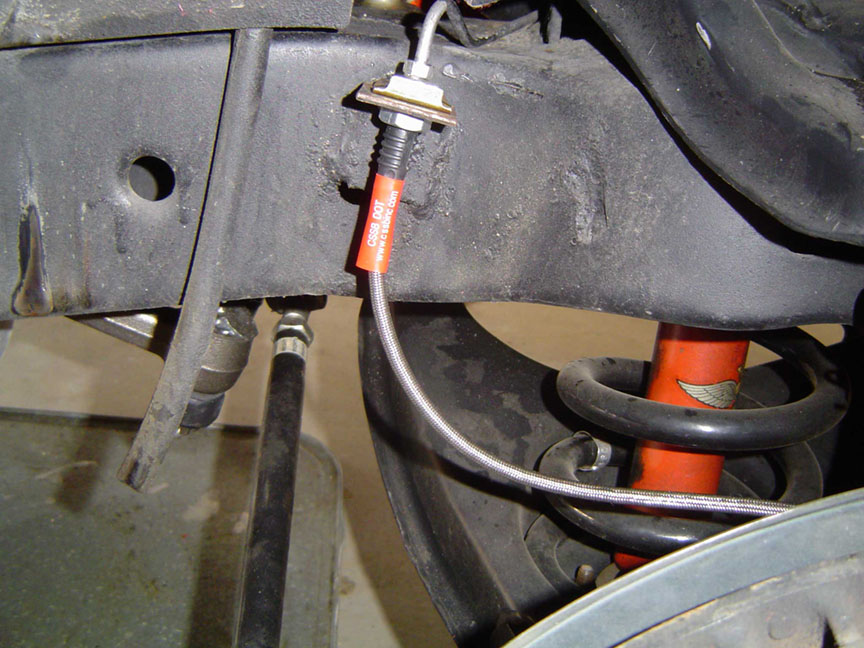
I also wanted to replace the original rubber brake hoses. The brake
hoses soften over time, and expand or stretch under pressure - brake
pressure you cause when applying the brakes. From experience with
motorcycle brakes, I knew brake hoses with braided a stainless steel
shield do not expand like rubber hoses. The result is a much firmer
brake pedal. The brake pads react immediately to brake pedal
pressure, so brake action is more immediate and firm.
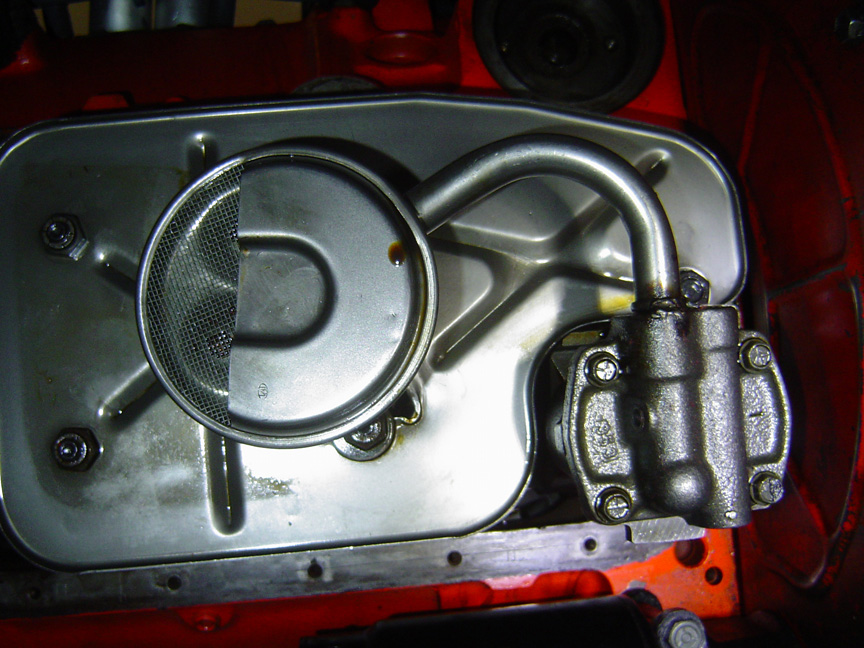
One Piece Oil Pan Gasket
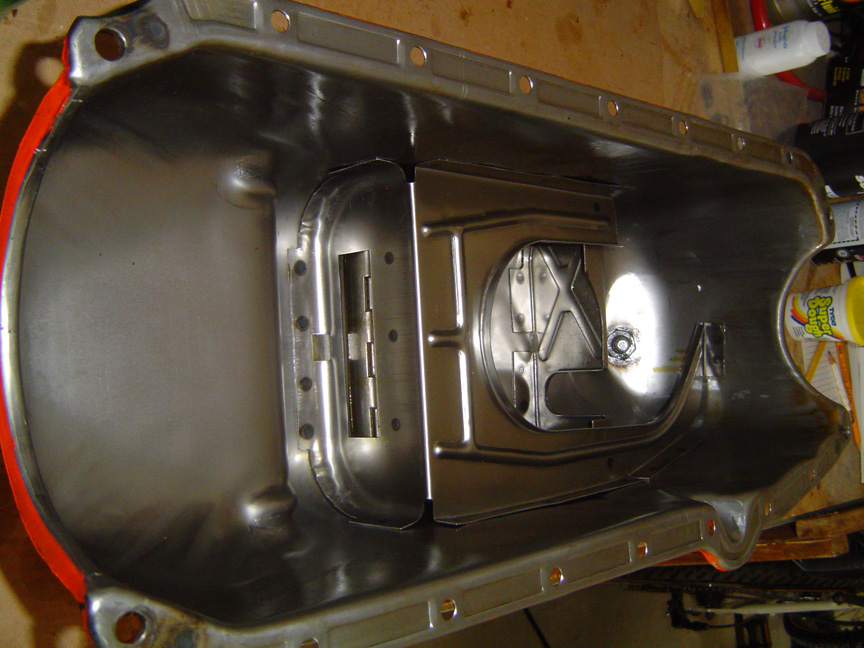
Hinged flap to keep oil from flowing forward under braking and starving
the oil pump
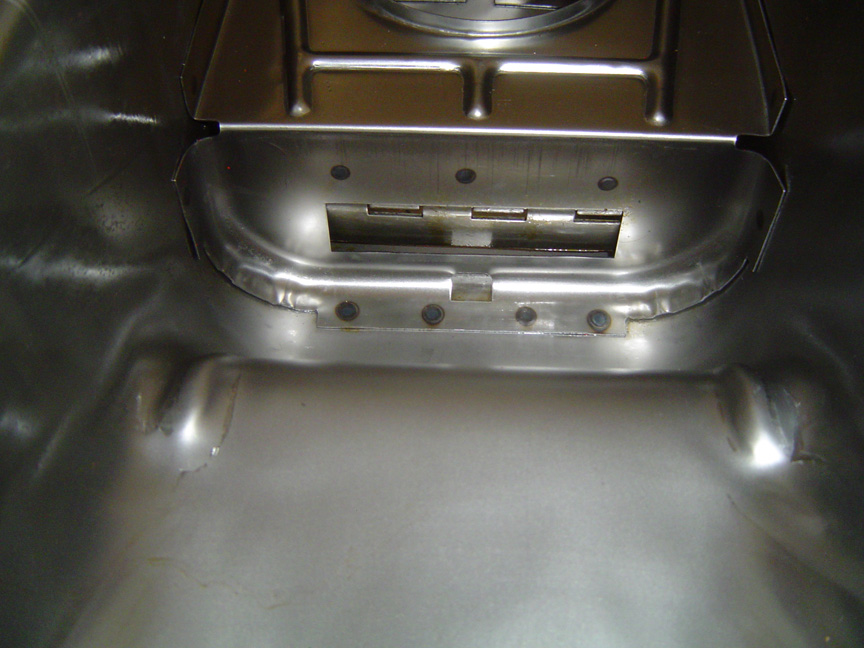
Oil's eye view of the hinged flap, looking back toward pump pickup
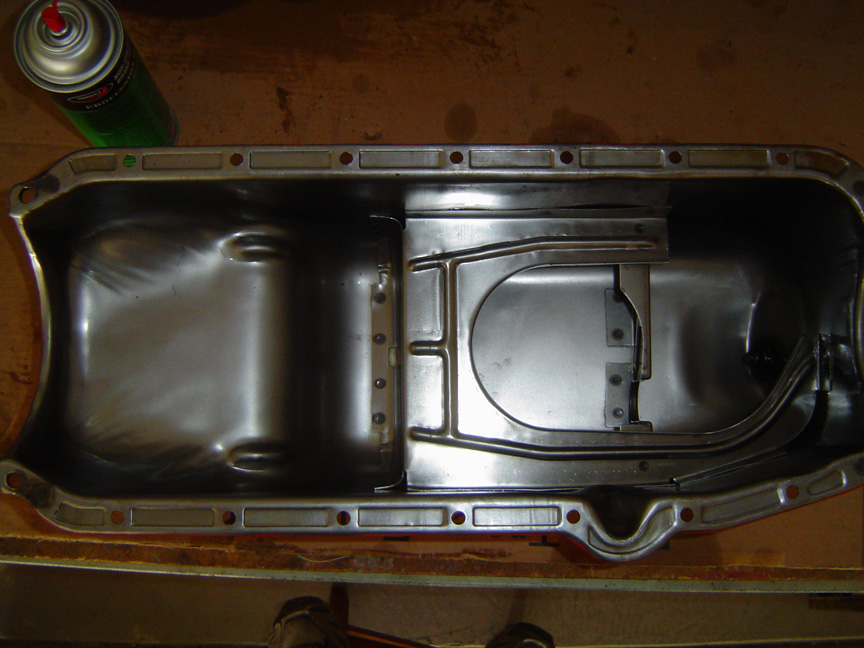
Screened pickup located in section with rounded opening Return
to New Engine Page
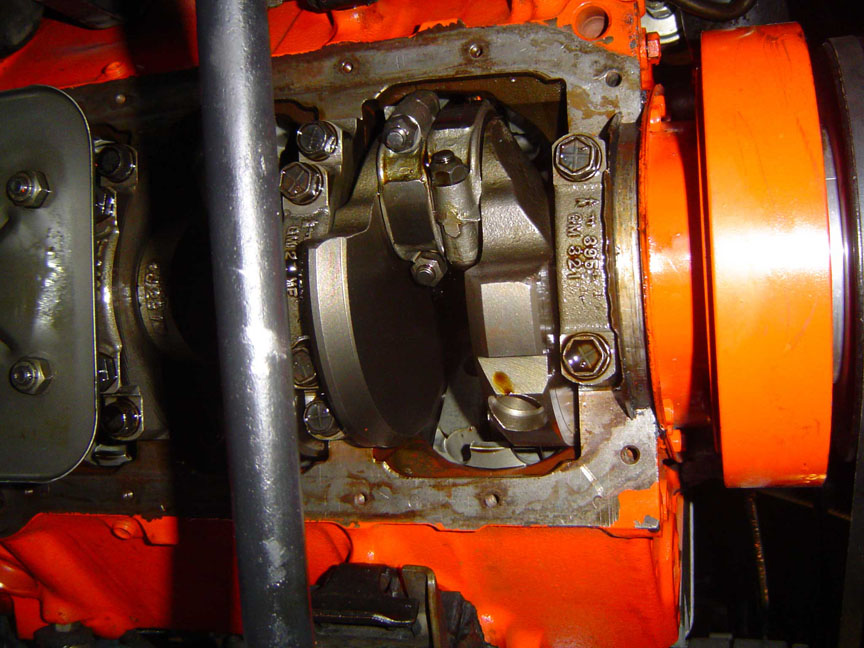
Oil pump and screened pickup - note welded pickup tube in pump
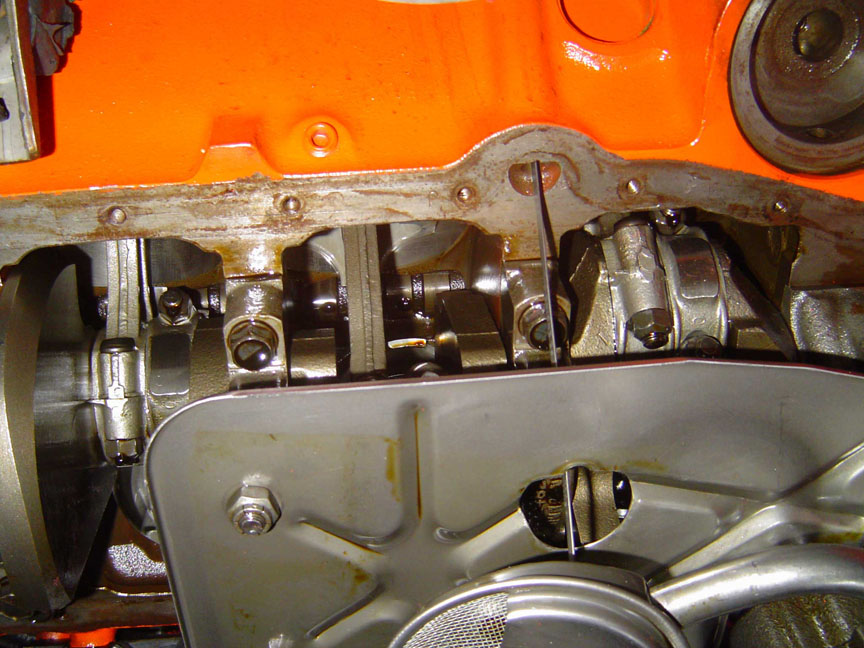
Four bolt main lower end
Windage tray
Still on jack stands for project
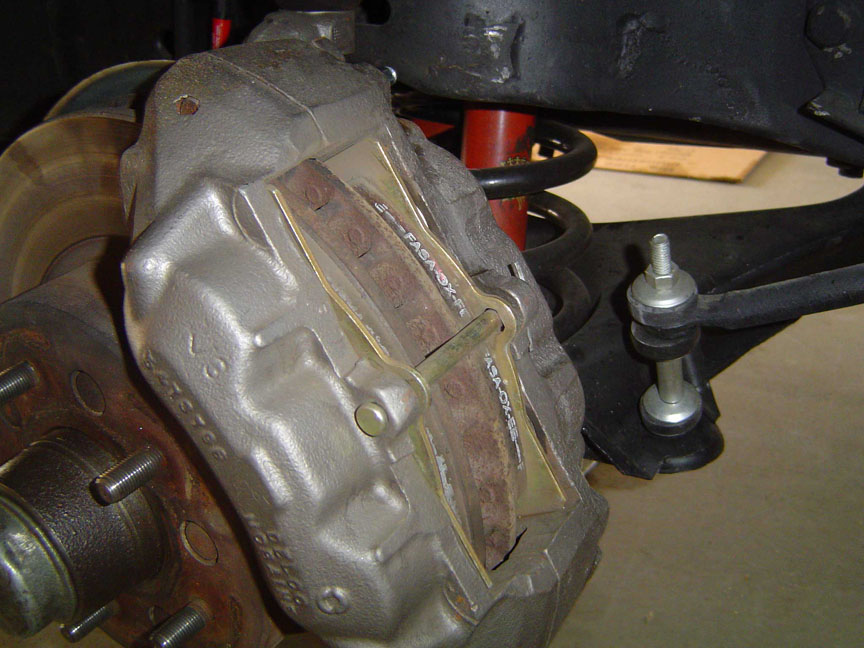
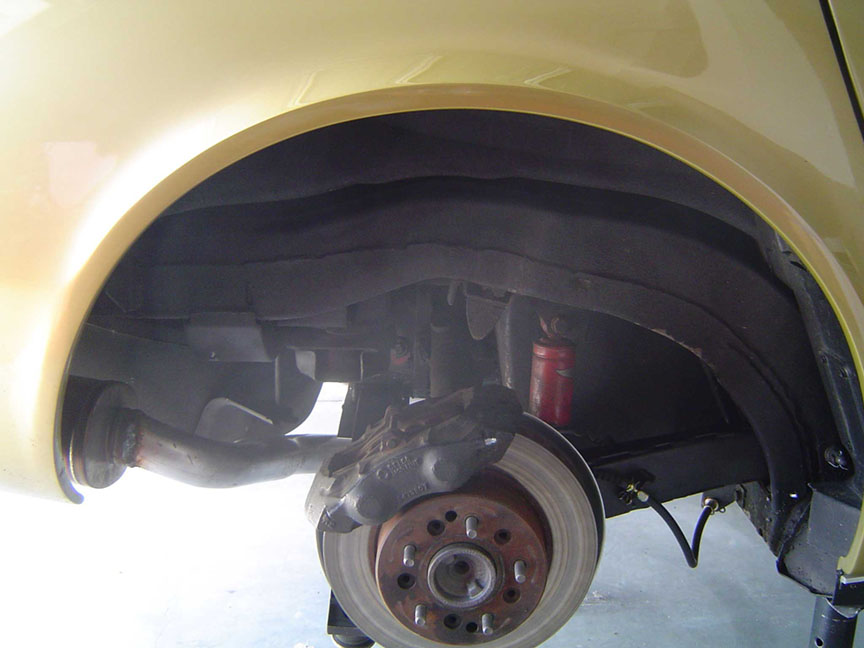
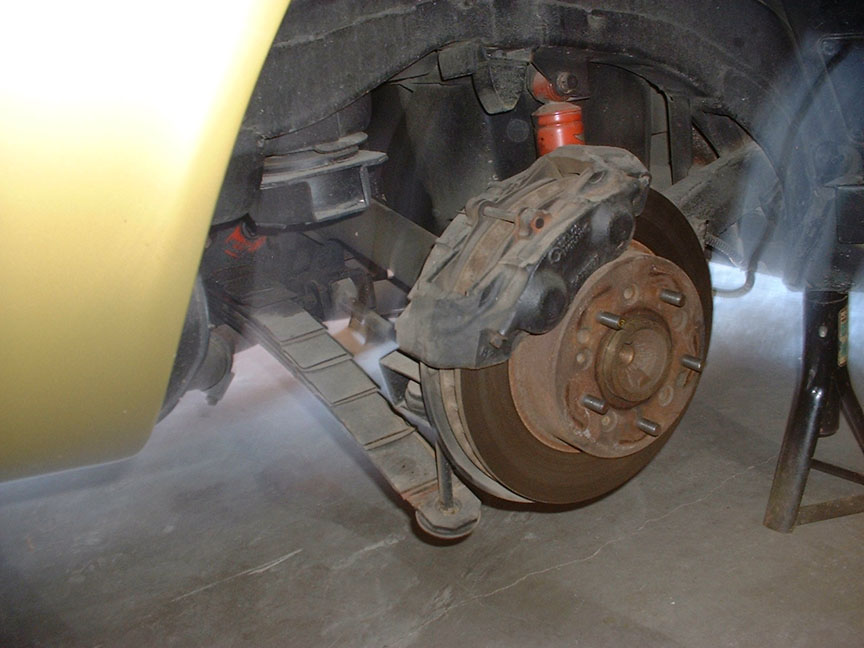
Front caliper - notice the rotors are
still riveted to the hubs - never been off - that's excellent on a
C2 or C3 Corvette. If they are separated, as is common on most
modern cars, it's almost impossible to get the rotors true to the hub so
the pedal will vibrate and it feels like the rotors need to be ground
true.
Front stainless steel line - what a
difference in brake pedal feel they make - a very firm brake pedal
Rear caliper & trailing
arm - new parking brake cables too
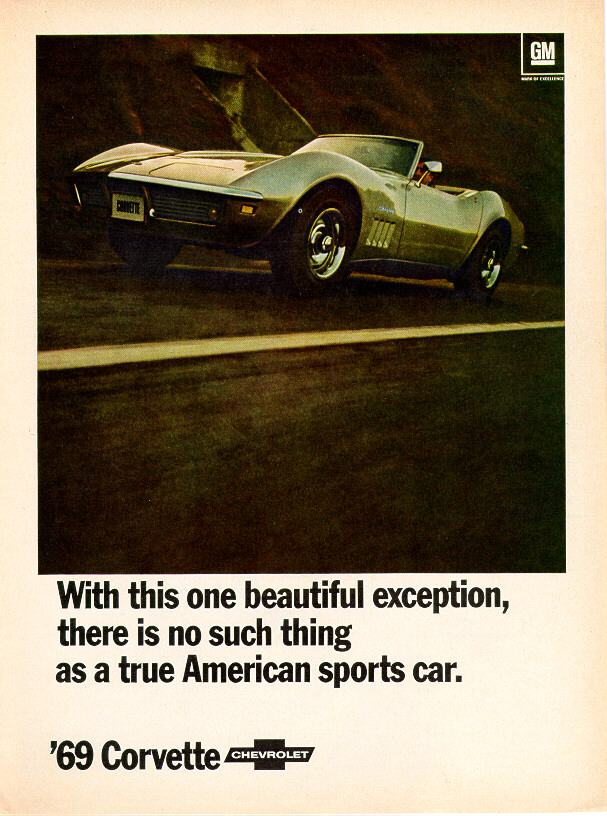
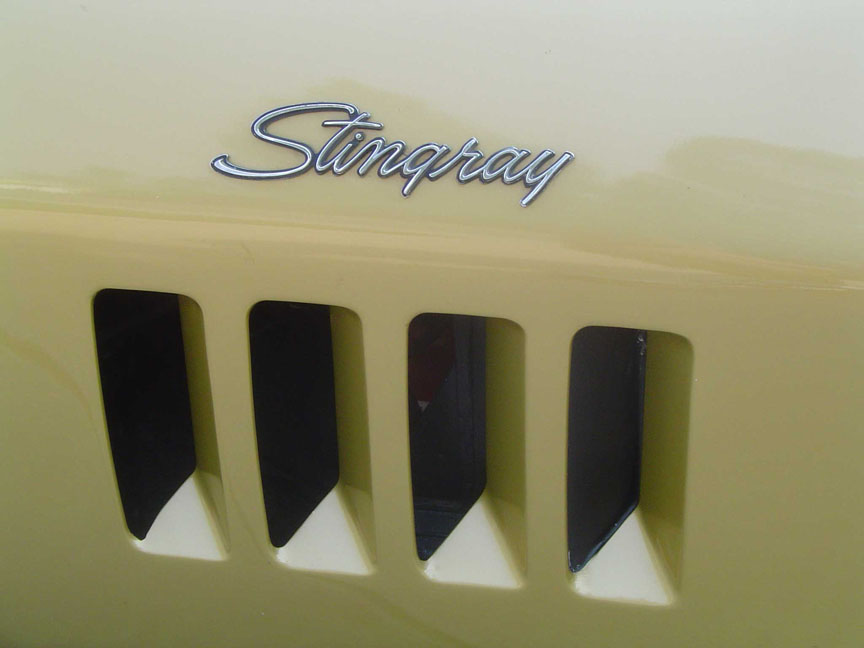
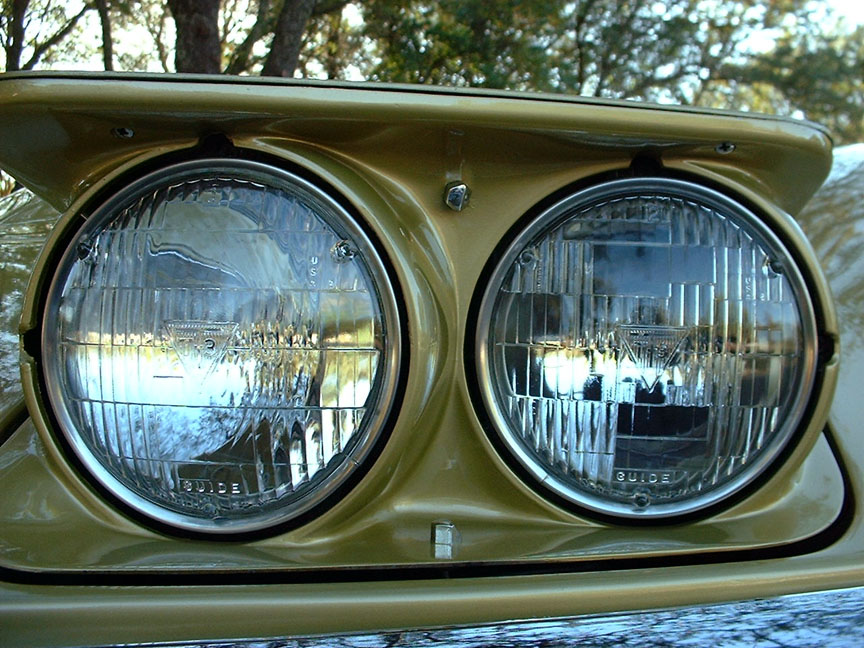
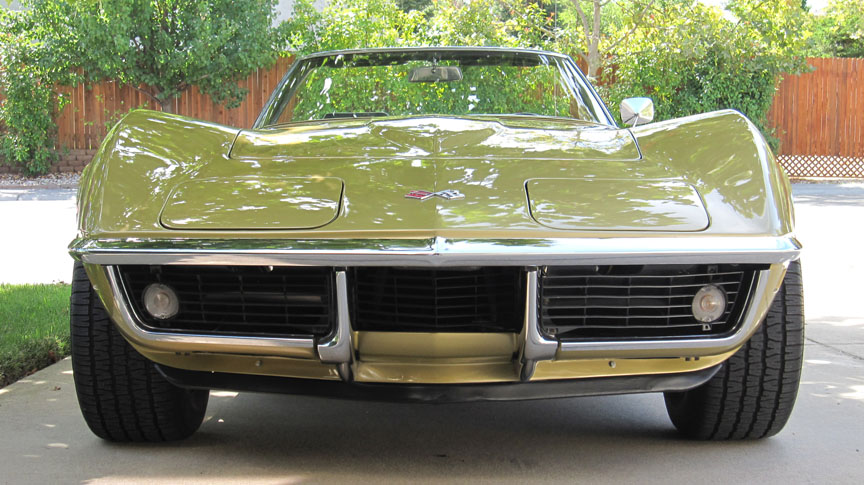
The reference to
Shark above is because this generation of Corvette has become
known as shark because their appearance, including the nose, grill,
and gills in the sides of the fenders. This 3rd generation is
now commonly referred to as C3, a numbering scheme that didn't start
until at least the forth generation which ran from 1984 through
1996, and included my 1986 model.
In the beginning, of course, they were just Corvettes. Then
in 1963 we got the Sting Ray (notice it is two words). After
the Sting Ray we got Stingray, the C3s. At that time the Sting
Rays were known as MidYear Corvettes, and still are often called
that, although nowadays C2 is preferred by most people. The
C1, or Solid-Axles ran from 1953 through 1962, or 10 model years.
C2 production run was pretty short with only 5 model years.
They are probably the most obtainable and
valuable of collector Corvettes - the C1s are often worth more, but
there are not as many of them,
So we come back to the C3 generation, the longest running in
Corvette history, 1968 through the 1982 an amazing 15 model years!
During this time the Corvette changed a lot in many ways.
Body-wise, we have the Chrome Bumper series, '68-'73, although the
'73 only had chrome at the rear. Starting in '73 and through
the end is the Rubber Bumper series, and this is further broken down
by cessation of the convertible after 1975, and replacing the flat
rear window and flying buttress "sails" with a fast-back bubble rear
window in 1978.
One reason for the long C3 production run was this was the period
Detroit had to clean up engine exhaust to meet smog regulations.
It was also the beginning of the safety requirements, the rubber
bumpers being the first visual manifestation. So we saw
horsepower reach a zenith in 1968-1969 and then slowly drop off as
unleaded fuel and other EPA requirements took hold. Big Block
engines of 427 and 454 cubic inches disappeared after the 1974 model
year. What the later C3s lacked in raw power they made up in
refinement and comfort options. The cars got slower but
quieter, smoother riding, and more comfortable.
Naturally, with this long production run there were a lot of C3
Corvettes built: 542,861 to be exact, more than any other generation
to date.
My C3 or Shark, being the second model year is more of a rough and
tumble car than the later ones, but it is an accurate reflection of
how they were built back then.
For more information about Corvettes, some
recommended books include: Corvette - America's Stan-Spangled Sports Car - The Complete
Storyby Karl Ludvigsen - The original is out of print,
but there is a new expanded edition available.
Corvette From The Inside by Dave McLellan Corvette
Chief Engineer 1975-1992
Zora Arkus-Duntov The Legend Behind Corvette by Jerry
Burton
There are countless other Corvette books out there so stop by a
book store and look them over.
Old cars are usually maintained or brought
back with a particular theme in mind. Today in the 21st Century, we
have so many choices facing us it is almost bewildering to contemplate.
Electronic fuel injection, five and six speed transmissions - automatic
and manual, air
conditioning add-on kits, power rack & pinion power steering, hydraulic
assisted power brakes, modern suspension components from newer Corvette
generations, the list is practically endless.
I thought a lot about
which direction I should take this Corvette. In the end, I decided
that except for the engine, I would keep the car as near stock as I could,
and keep it as original as possible. I don't intend to have it
judged by the NCRS,
(National Corvette Restorers Society) an organization that sets standards
for judging Corvettes, to be as close as possible to how the car left the
factory, St. Louis in the case of the C3. From now on, every part that goes into or on
my Corvette will be as close to NCRS standard as possible.
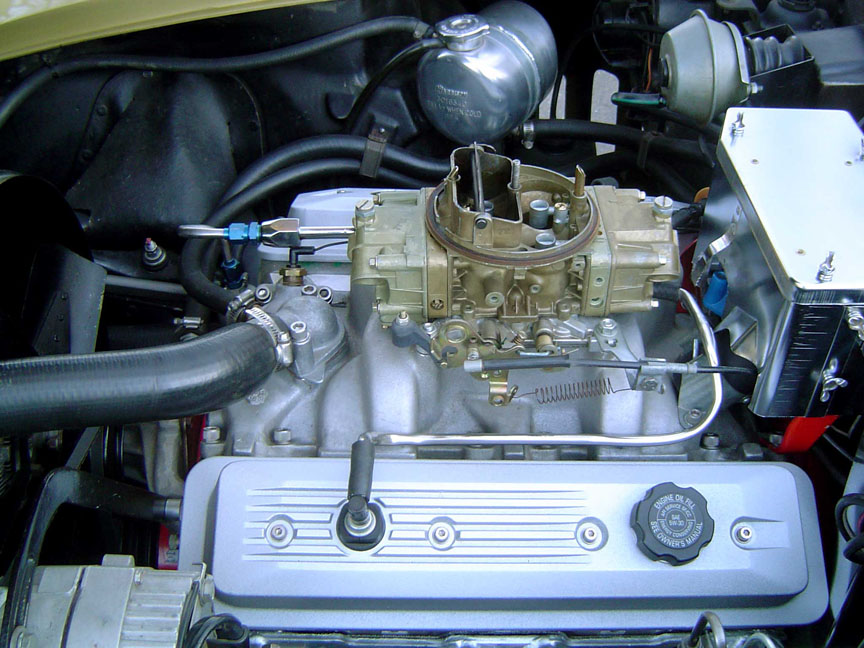
The major
distractions to that concept are the entire engine, exhaust system, and
the stainless steel braided brake lines. BUT, the saving
grace, so to say, is that the ORIGINAL, numbers matching engine is
perfectly good, and after a sympathetic overhaul, it can go back in the
car, along with the original carburetor and all the smog equipment - all
things that are important for an NCRS judged Corvette. One of the
major deficiencies the NCRS looks for is a NOM, Not Original Engine.
Virtually every component on an old Corvette can be had as a reproduction,
with correct date code, and other identifying codes. But an engine
block MUST be the one that came with the car originally. If the VIN
stamped on the block does not match the car, it's a NOM, and the car's
value is seriously depreciated.
The exhaust
and brake lines can easily be replaced with OEM parts, so a future owner
could conceivably receive favorable treatment by an NCRS judge if he or
she desired. With all this in mind, I have directed my energies
toward making this Corvette a period-correct, early 1970s, moderately hot
rodded Corvette - that's my theme and I'm sticking to it.
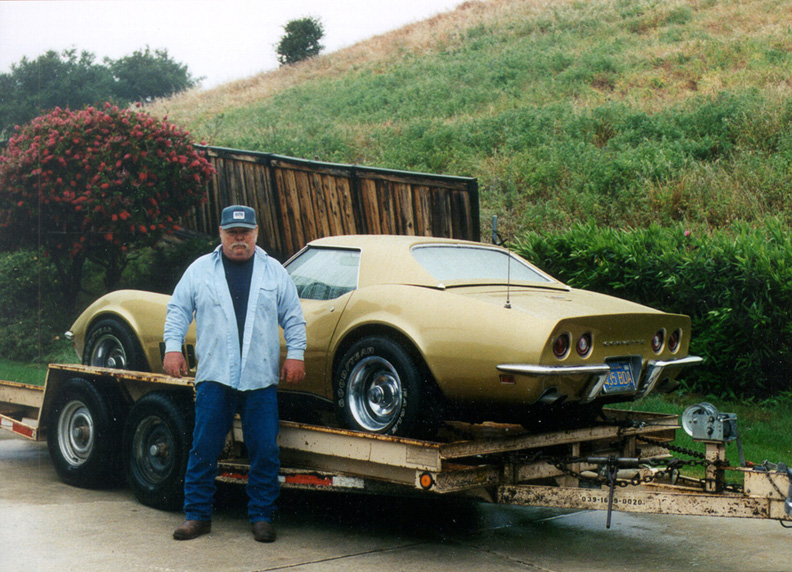
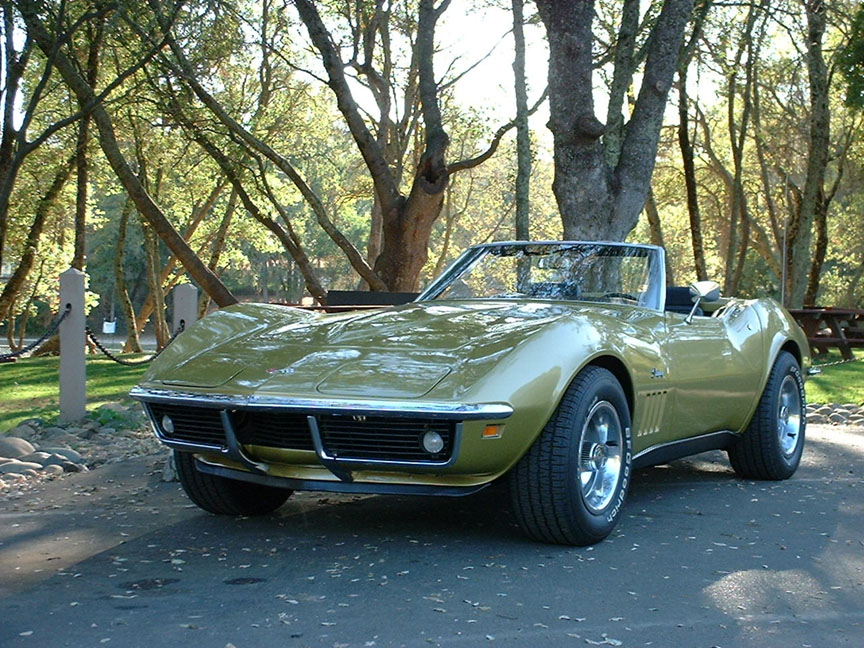
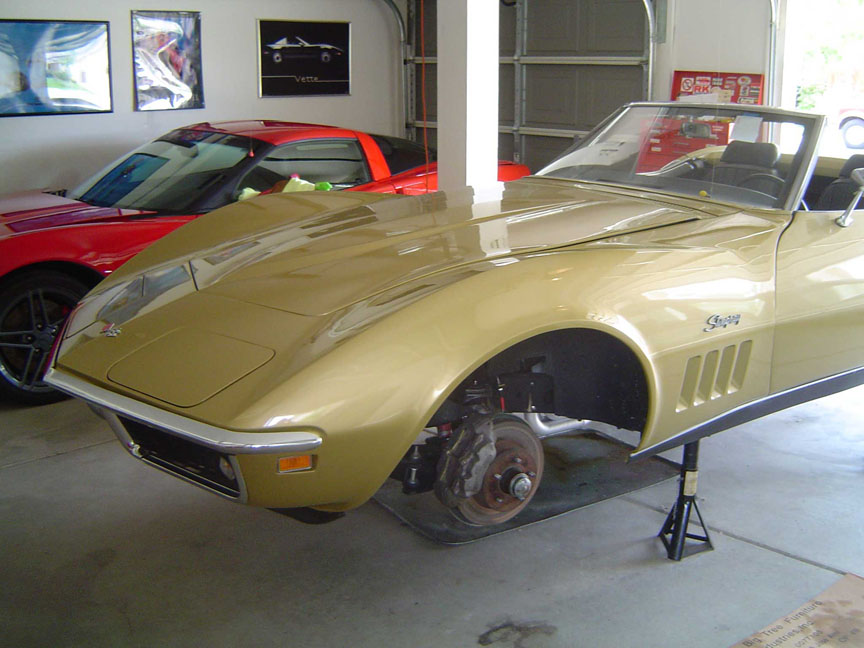
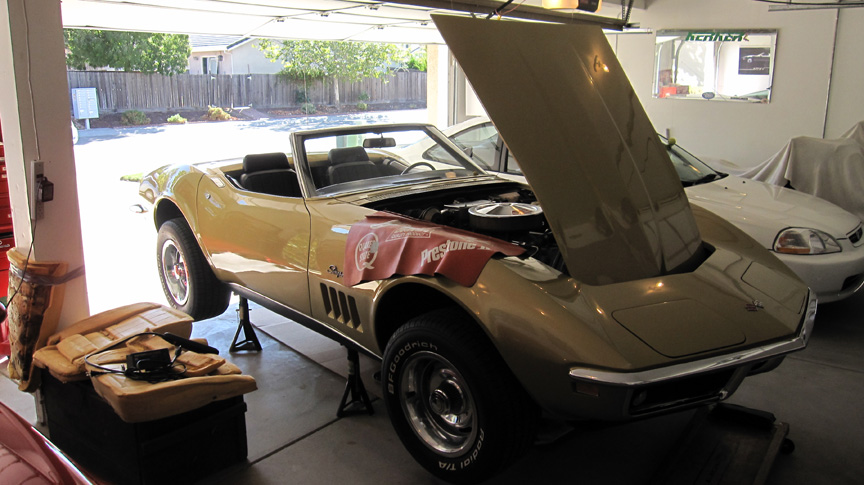
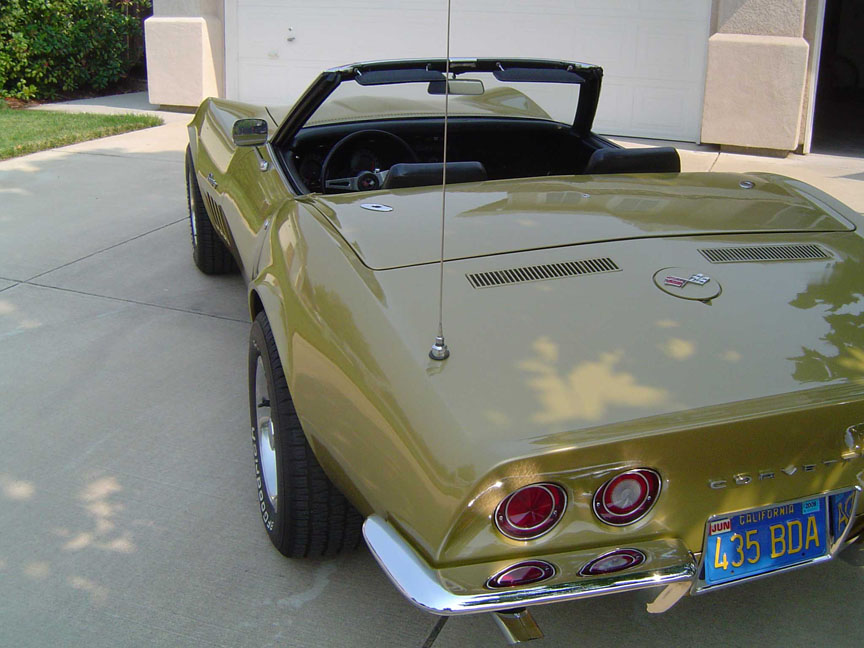
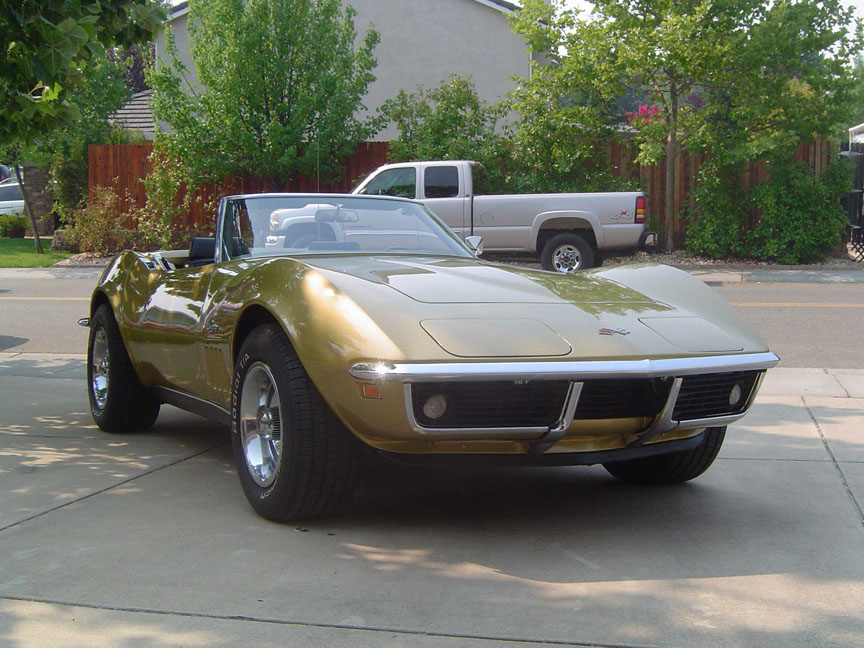
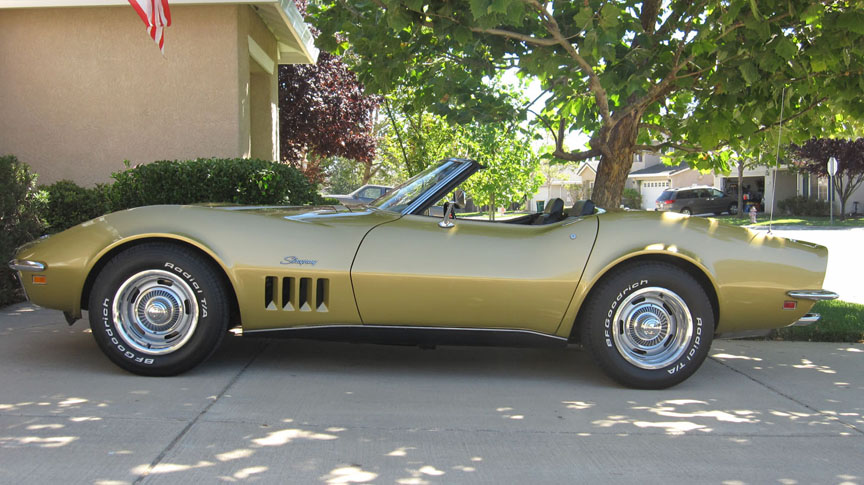
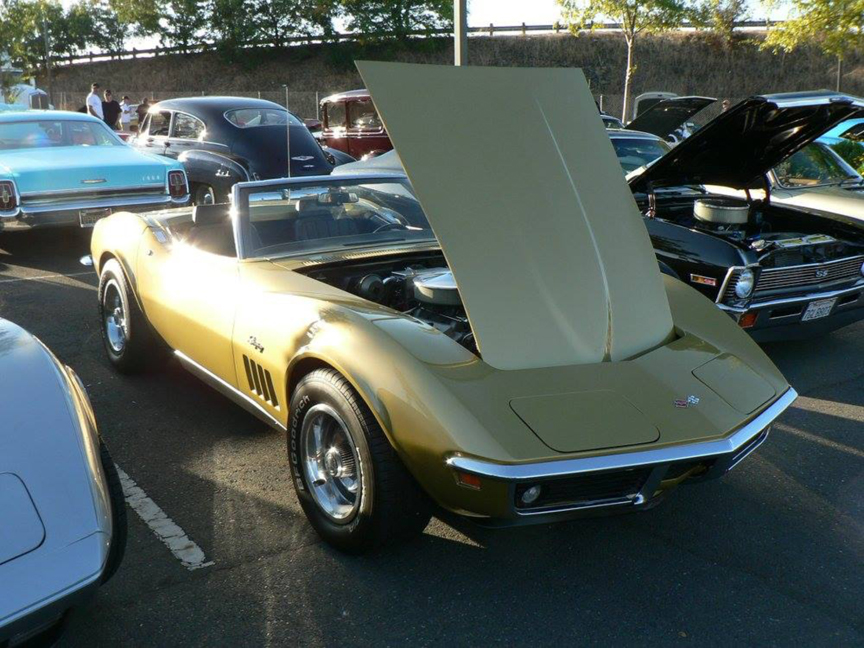
The next three photos illustrate how close to original the car is.
Except for the B. F. Goodrich Radial T/A tires, the car appears virtually
the same as it did in the first pictures at the top of the page.
Even the license plate is the same, albeit, the front one is removed here.
Those white stripe tires, by the way, were not radials, but the last gasp
of bias ply tires.
The C2s and C3s had the same front suspension. Ball joints on the
steering spindle was a big upgrade from the kingpin style used on the C1s.
This is pretty conventional independent front suspension, with a
recalculating ball steering box. This is not my car, was taken of a
frame off restoration.
Factory perfect Corvette front suspension
The bolt/nut peeking out of the spring was an attempt by a Chevrolet
dealer to right the list to port.
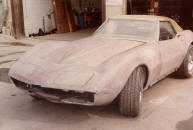
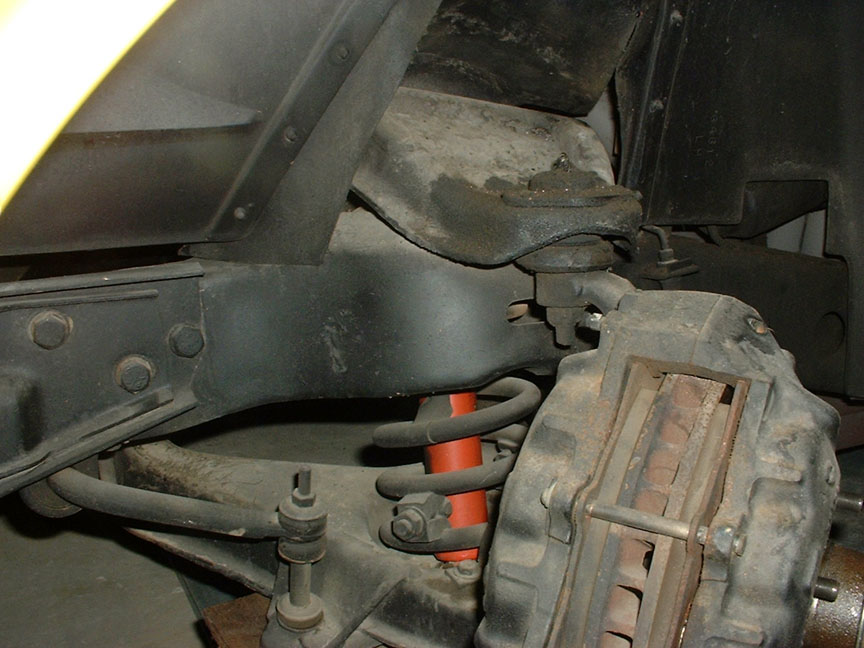
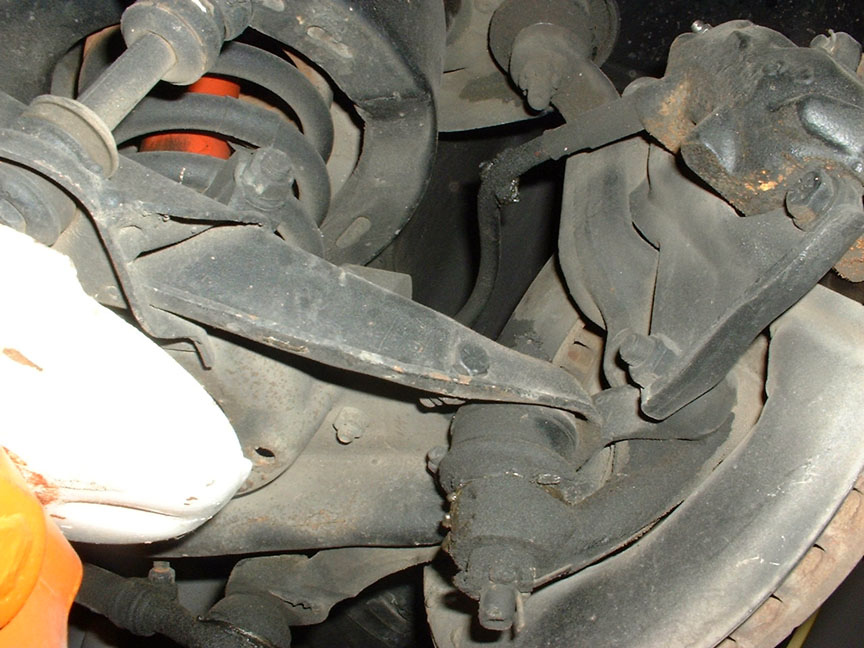
This disgusting mess is what my front suspension looked like at about
130,000 miles.
After the front was rebuilt correctly, it was too high in the front, and
still had a list to port- like most Corvettes it leaned slightly left.
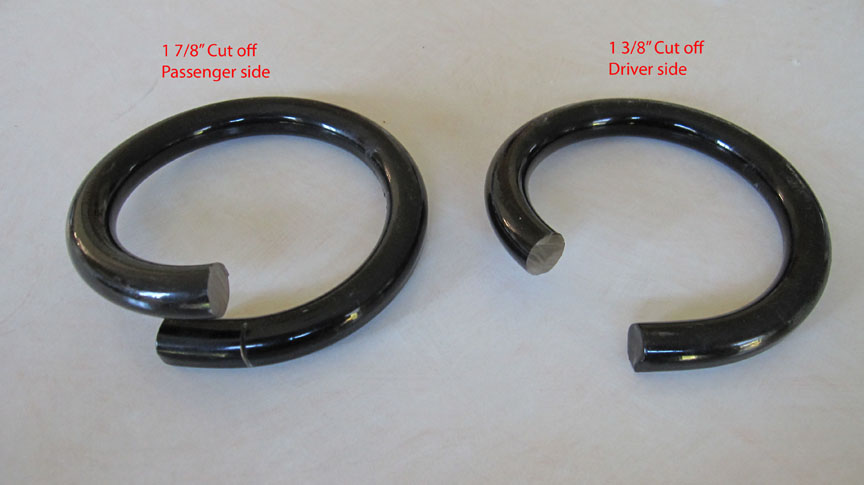
The new springs were 360#/inch, but cut down are about 550#/inch,
Big Block performance springs
Alas, too much was cut off the springs, so these aluminum spacers now sit
below the front springs and bring the ride height up to specification
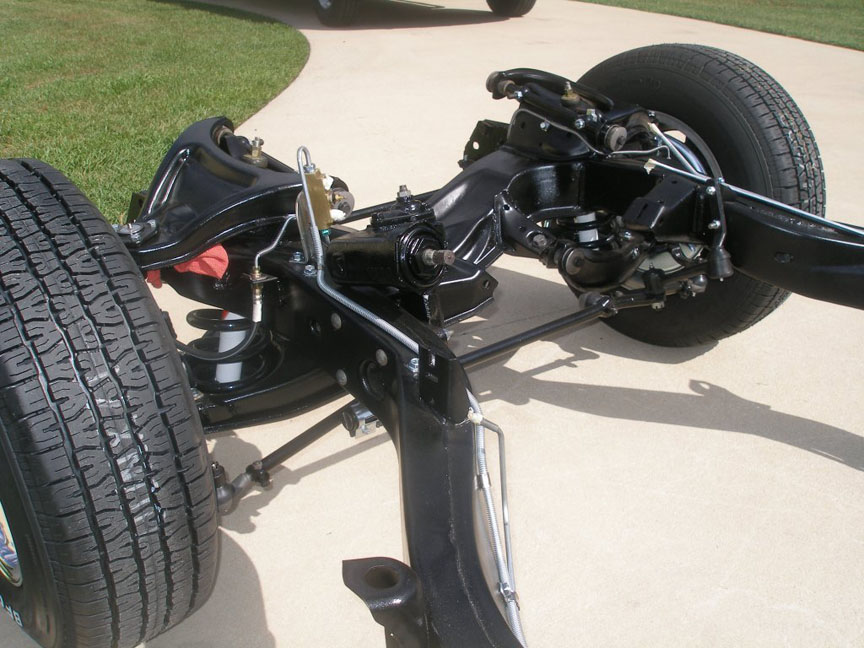
The C2s and C3 had very similar Independent Rear Suspension, a rarity back
then. This photo shows a perfectly restored rear suspension to
give an idea of what the IRS looks like. Difficult to see are the
trailing arms that house the rear wheel bearings at the wheel end, and
are pivoted in the frame at the front. The differential housing is
solidly mounted to the frame front and rear. Wheel movement is
controlled by the trailing arms, the half shafts, and the struts below the
half shafts. The rear spring is a transverse leaf, not visible in
this photo.
I had a local Corvette specialty shop redo the rear suspension. All
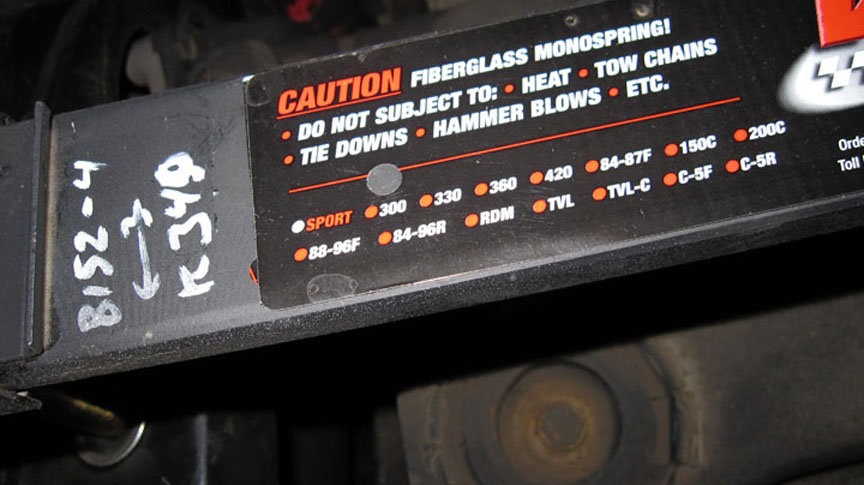
bearings and bushings were replaced with new parts. The heavy leaf spring
was replaced with a composite unit that is lighter and has no inter-leaf
friction to impede the spring's action.
Complete Corvette IRS - from a frame off restoration
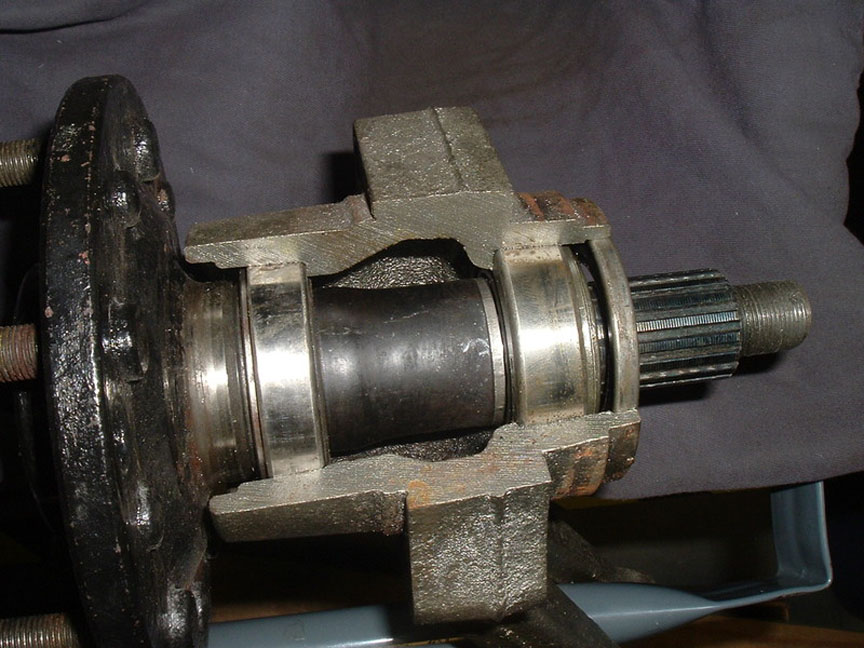
Cutaway showing rear wheel bearings - this unit bolts into the rear of the
trailing arm. Special tools and a press are required to replace the
bearings and set up the preload.
Rear suspension before rebuild
The white paint indicates the spring rate is 340 pounds per inch
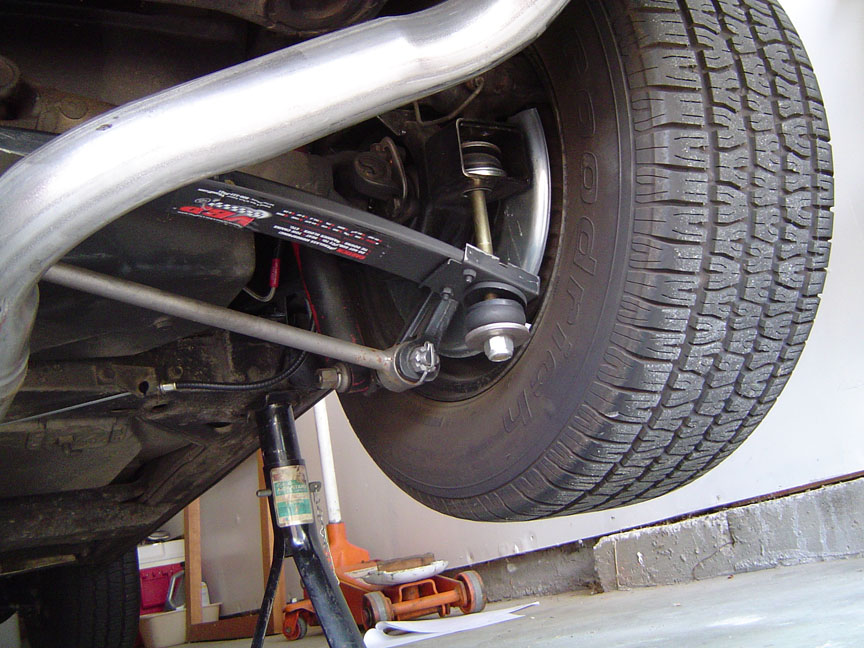
The composite spring rear includeding new rotor dust shields, rebuilt
struts, and bolts - the car "hangs" on the bolts
Once I had the car completely sorted out and
began to drive it more, I realized that the stock steering was
no longer satisfactory for an old guy like me. Back in the day, it
was easy for me to drive and park the car. Driving on a twisty road,
the best kind, became a wrestling match. I'd brace my body with my
legs and give a big push or tug on the wheel to set up for a turn.
Modern cars were much easier to drive.
The stock C3 power steering was an add-on assist. It consisted of a
hydraulic ram attached to the steering linkage, the relay rod to be exact,
that was controlled by a complicated hydraulic valve which sensed steering
wheel movement and directed hydraulic pressure to the appropriate side of the ram. GM developed integral power steering boxes that brought the functions of the
ram and hydraulic valve into the steering box. But these new boxes were too large to use
on the Corvette's old chassis which dated to 1962, so the C3 cars soldiered on though the end
of the 1982 model year with the old system.
I couldn't easily add a stock power steering system because the ram
crossed under the oil pan, right where the larger 6 quart oil pan was. I did some research and
learned that the Borgeson company had modified smaller Delco-Remy steering
box originally designed for some Jeep vehicles to fit the Corvette
chassis. This was done by gutting the housing, machining off the
original mount points, mounting the box in a jig to ensure correct
alignment of the internal parts, and welding on mounting brackets to fit
the Corvette frame. The internal parts were then installed and
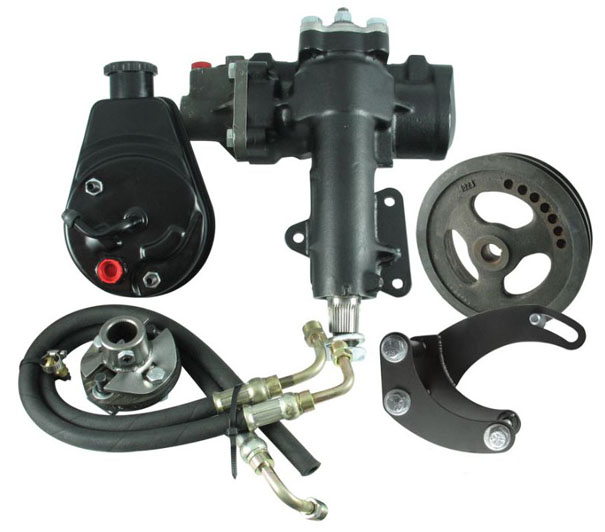
adjusted to new specifications. I ordered the complete kit which consisted of
the steering box, the power steering pump with pulley and bracket to bolt
it to the engine block, hoses, and a "rag joint", the coupler to connect
the car's steering shaft to the new steering box.
I had a local Corvette specially shop install the kit
because it seemed like a bigger job than I was willing to tackle.
What an improvement!!! The car was easy to steer, and just as
important, the steering ratio was speeded up from 16:1 to a quick 12.7:1.
This is the Borgeson kit: pump, steering gear, hoses, rag
joint, bracket, & pulley
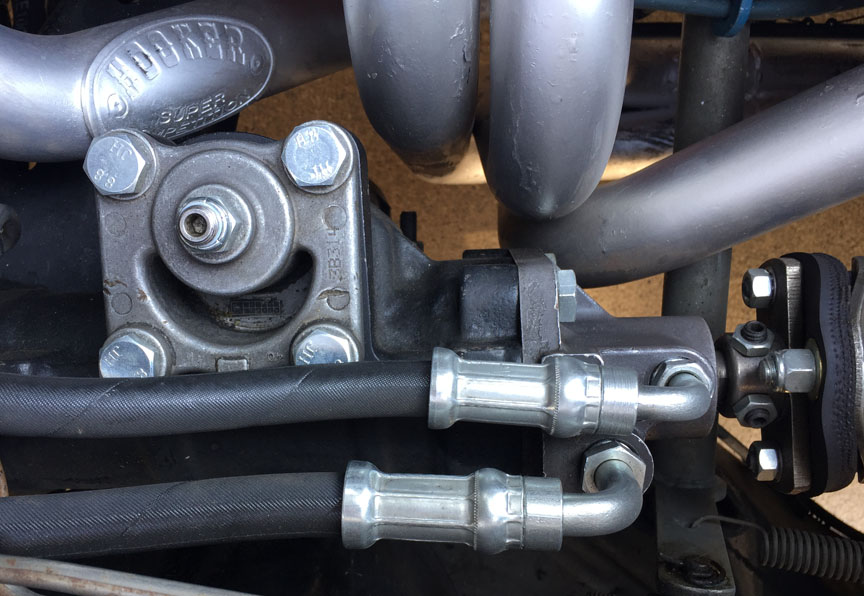
Here is the Borgeson kit installed, Rag Joint on the right. The pump
is hidden below the alternator.
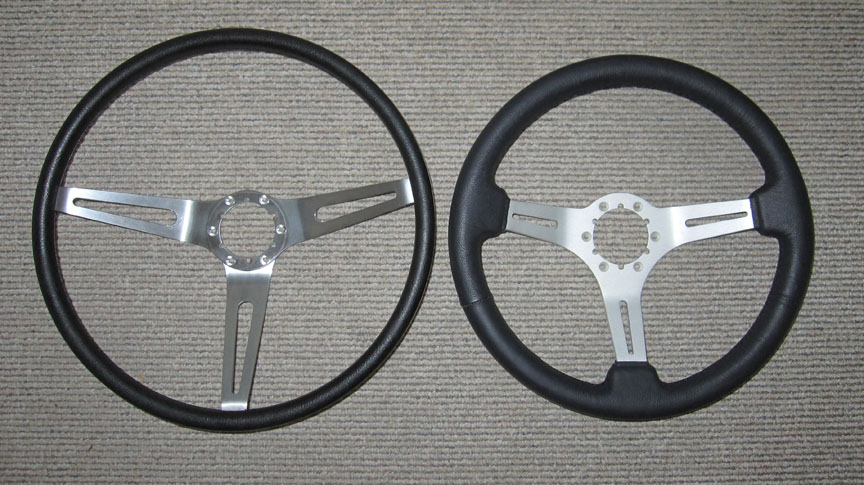
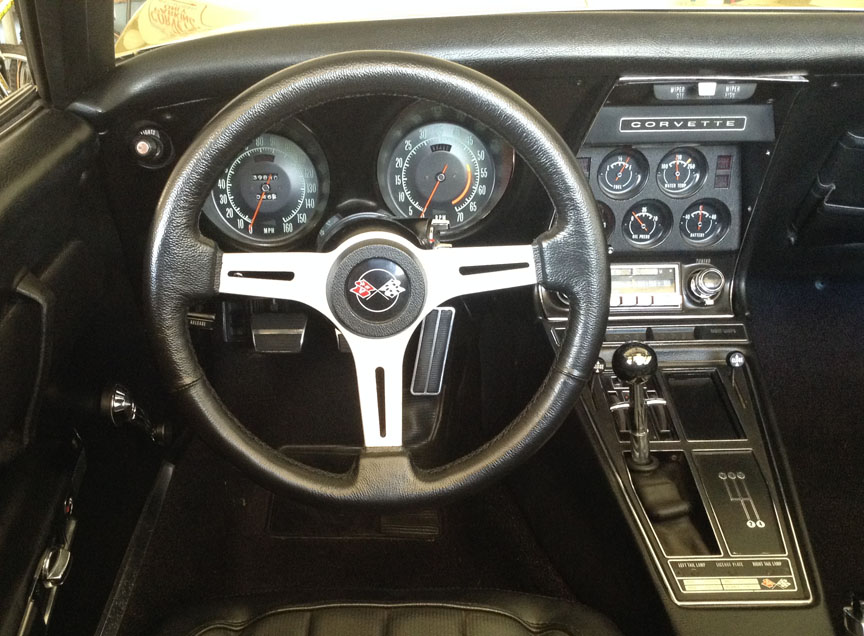
I quickly learned the large, thin rim
steering wheel was not necessary for leverage, and felt distinctly odd
compared to modern cars with their thick rims. I found this steering
wheel, which is very similar to the stock wheel, at an on-line Corvette
supply house and ordered it. It feels much better, makes driving the
car easier, and as an added bonus, getting into and out of the car much
easier.
Size comparison - 15" vs. 13.5"
The new wheel in place - non-C3 fans would be hard pressed
to tell it's not stock Return to Top of Page
In March 2011 I had the Borgeson power steering
unit installed in my manual steering ’69 convertible. The install
went well, and the owners of the shop raved about how good the car
steered compared to the stock linkage assist power steering.
While driving home, I gassed the car and felt a
slight hesitation, but since the tank was almost empty I thought the
pickup ran dry for a moment and that’s why it missed a beat. When I
got to town, I stopped at a busy Chevron station put about 15
gallons in the tank. I haven’t filled it for years as the interior
smells like gas when the tank is full. As I left the station, the
engine kept dying, so I had to juggle my two feet between the clutch
pedal, the brake pedal, and the accelerator (it's a skill one
acquires when driving a car with certain poorly functioning parts) as I
moved through traffic and onto the freeway home.
As I accelerated up to highway speed, the
engine quit like I turned the ignition off. I let off the gas and
it picked up again. I tried to gas it again, and it died, but
caught when I got off the gas. I could maintain 35-40 mph, but that
was all. I pulled off when I got to a breakdown lane and with the
flashers on, opened the hood and removed the air cleaner. I gassed
the throttle at the carb and could see fuel squirting out of the
accel pump squirters. As I seemed to have fuel, I took off up the
hill to home. Same problem; it would die with a heavy foot on the
gas, so I was limited to about 45mph in the breakdown lane with the
four-way flashers on to get home.
I called the shop and
asked them if they had a problem with the car when they test drove
it for the steering. Both owners said it ran fine for them,
they ran it up through the gears. One said sounds like water
in the fuel, try some gas treatment. I tried that, no
difference.
Since I did seem to have fuel in the carb, a
friend, a very experienced engine and car builder, said it could be
loss of spark. It sure felt like the spark was going away when it
lost power – no stumbling, or backfiring through the carb like a
lean condition will do. It felt like the key was turned off and
then back on. I took the distributor cap off, and checked it for
carbon tracking, cracks, and other abnormal conditions. All looked
fine.
I have the One-Wire Breakerless Electronic conversion
kit in the distributor that eliminates the ancient point system.
One Wire Breakerless Ignition so I called their tech dept. and asked them about failure modes.
They said unless the unit had failed, it will fire unless the input
voltage drops below 4.0 VDC, at which point it shuts down to protect
the internal circuitry. Using some wire to extend the VOM
probes, I hooked up a digital volt meter to the +
side of the coil and ground and took the car for a drive with the
VOM on the seat beside me. I had 9.6
V at idle, and 11.3 V at 3K rpm. I had a steady 11.3 V when the
engine cut out, so it appeared that I didn’t have
a bad ignition module, and since the voltage held constant, the car
wiring was not the problem.
In the past I had problems with the Holley DP
(double pumper) carburetor getting “stuff” into it and causing problems, I decided to
remove it, tear it down, and clean it out. I did all that, and
found no smoking gun, no crud in the carb, nothing that shouldn’t be
there. I reinstalled it, couldn’t get the engine started. I took
the fuel line off the carb inlet and cranked the engine with a hose
on the fuel line going into a jar. I hardly got any fuel out of the
pump, just a weak stream so I went on to the next suspect, the sock
filter in the tank. Technically, the next component in the
line is the fuel pump. But if I had gone directly there , I
would have missed all the fun with the fuel tank.
Since the sock filter in
the tank is original, I thought, and was told it could be clogged.
The inside of the tank looked good, not any real rust of note; just
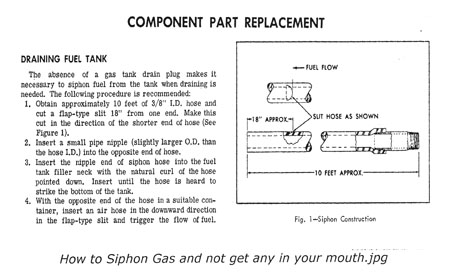
a couple of dime sized spots. I drained the tank using the
Chevrolet Service Manual method of siphoning the gas.
I had my Chassis Service
Manual at hand for the step-by-step instructions, but most helpful
in this entire adventure was having copies of the pages from the
1969 AIM (Assembly Instruction Manual - used by the factory) stapled together and at hand as I worked through the
removal and installation. The AIM has nice large line drawings
of each assembly, and torque values are right there for all the
fasteners. The AIM was really more helpful than the Chassis
Service Manual.
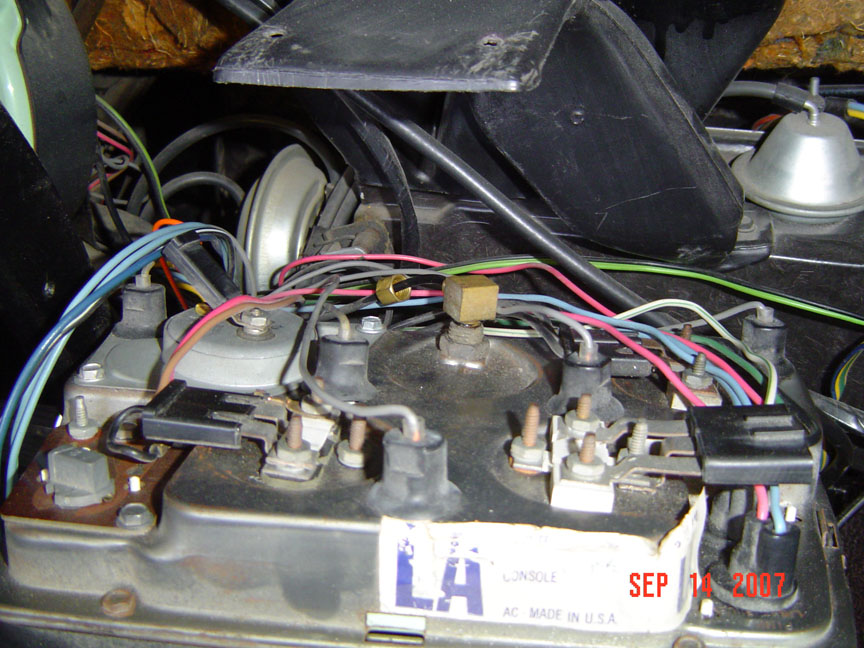
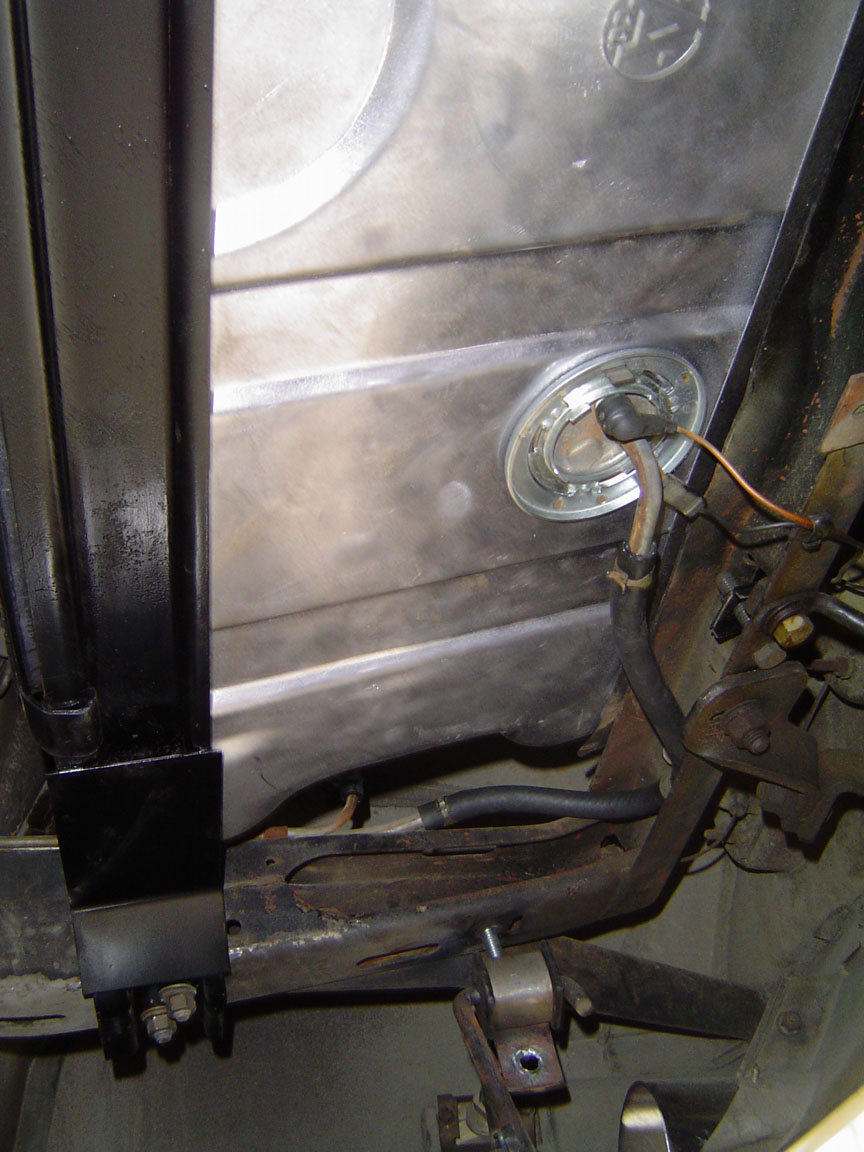
It was necessary to empty
the tank because the ring that holds the pickup and fuel gauge
sending unit is located on the bottom of the tank. This shot
shows the new tank installed in the car, looking straight up,
showing the ring, the sending unit, and the fuel gauge assembly in
the tank.
With the tank almost empty, I removed the ring
that holds the pickup and fuel gauge sending unit, so I could remove
the unit and replace the sock filter. The sock filter was split in
several places, definitely needing replacement. While I was at
it, I decided the tank was almost out, so why not remove it so I
can replace the supply and return hoses. I reasoned that the hoses
were forty plus years old and probably deteriorated causing the gas
odor in the car. Also, I wanted to see the built sheet which lists
the options built into the car, the recipe for the assembly crew to
follow, so this was my opportunity to kill two birds with one stone,
so to say. Following the steps in the Service Manual, I got the
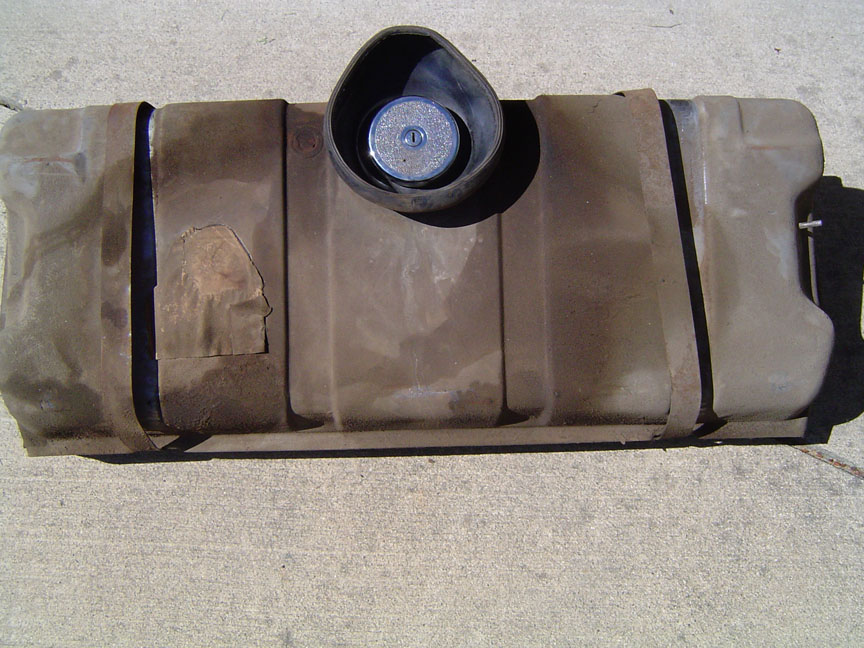
tank out pretty easily. But what I saw was not pleasant:
Old
Fuel Tank finally on the ground
The tank appears to have
been leaking at the front and rear seam as well as from that “seal”
just to the left of the filler neck in the depression. And the
built sheet was toast!
Reproduction tanks are not
very expensive, so I ordered one from Paragon a Corvette restoration
supply business, along with a new
non-locking cap, and the anti-squeak insulators that have to be
glued to the tank. The parts arrived in about 10 days – east
coast to west coast.
The tank came with a
gasket for the filler neck, and new screws with O-rings under the
heads to attach the filler neck to the tank, as well as a new gasket
for the sending unit, and a new locking ring to secure the sending
unit.
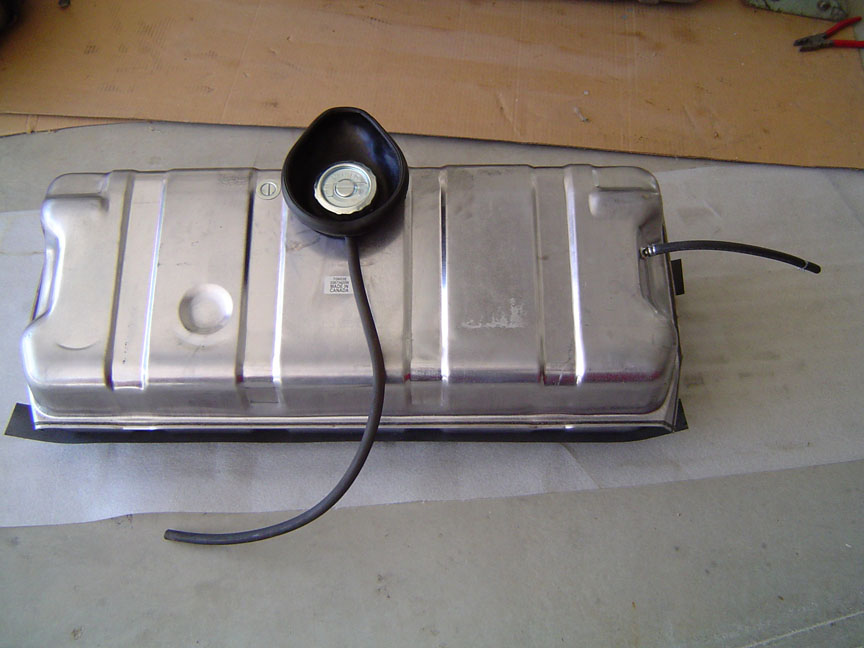
New
Fuel Tank ready to be installed
The new tank ready to go in the car, complete
with new non-locking cap. The small hose on the right is the fuel
return line which comes from the fuel filter on the ‘69s, which
returns excess fuel to the tank helping to keep the fuel cool. The
long hose is the overflow to catch and drain away any spillage when
filling the tank.
The tank went in pretty easily once the left
muffler was dropped to the ground – an undertaking in itself as mine
are welded from the header flange to the chrome tip. The hardest
part was hooking up the fuel return hose. I found that using
silicone spray on the hose and on the fitting let me easily slide
the hose on, and to slide the little spring clamps into position.
This has to be done with the tank partially in place, but rotated
90° forward as it must be to remove and install in into place. So I
was on my creeper on my back, balancing the tank up in the car, and
trying to use my other two hands to get the hose attached securely.
It was a learning experience I tell ya.
With the tank in, I decide
that while I have the car on jack stands, I’ll take the fuel pump
off and take it apart to inspect the valves. Since I still
hadn’t found a real cause for the problem that started all this, I
reasoned that, perhaps the old torn sock filter in the tank had
allowed some crud in the tank to get into the pump and jam a valve
open, or partially open. My pump is a GM Fuel Pump High Capacity (Small Block). For use on carbureted
engines. Pump has 7psi shut-off pressure and a free-flow rate of
30gph. Lower housing can be rotated to reposition inlet and outlet
ports.
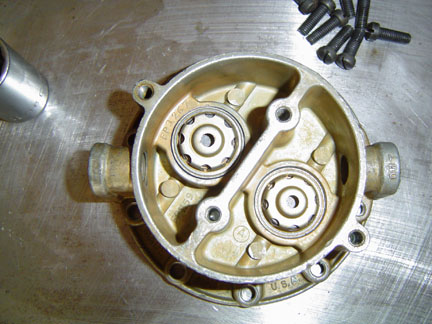
I removed
the pump, took it apart and found this:
Fuel Pump Valves - There is a big problem here!
You’ll notice both valves look the same, which
is wrong. These are one-way check valves; the input valve on the
left should allow fuel to flow into the diaphragm chamber and the
valve on the right lets fuel flow out of the chamber to the
carburetor via OUT fitting on the right. The input
valve was not seated, and slightly cocked, so I took a small screw
driver and pried it out.
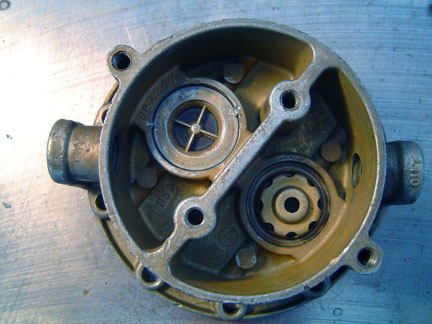
Then I put it in the
correct way, tapped it home with the socket you can see in the
previous photo and staked it to keep it in place. Note the
stake marks at o'clock 2, and 9 o'clock....
Fuel Pump Valves Staked
This
was my smoking gun! I had finally found a real problem that was
causing my engine to cut out. The pump has only a few thousand miles on
it, and has always until now worked well. What caused that valve to
come out of its hole and flip over? How did the engine even run
with the valve flipped over like that? (That rusty color is the
photo, not rust in the pump.) I hate to say this, but this
failure is an indication of poor GM quality in a premium part.
I got the pump back
together and back in the car – it’s amazing how something so small
and easy to reach is so hard to bolt to the block. I did use
the trick I learned on the Corvette Forum where I removed the
bolt on the front of the block and installed a longer one to hold
the push rod in place. That’s a neat trick, works well and
eliminates the hassle of fooling with the push rod while trying to
get the pump bolts started.
One final roadblock awaited me – somehow I got
some crud in the primary needle/seat during my work on the various
parts of the fuel system, so when I started the car, I
had fuel dribbling off the boosters, and causing the engine to run
very badly. I tried to adjust the float down but ended up with it
on the bottom of the bowl, and still letting too much gas into the
bowl. I took the needle/seat out – simple on these carburetors, just
loosen the lock screw and screw the needle/seat out of the bowl. I
examined it with a magnifying glass, and didn’t see anything so I
put it back in but it still leaked and flooded the engine. Then I
did what I should have done the first time; I removed the needle/seat
and blew it clear with compressed air - I have a dandy 220V, 5 hp,
60 gallon compressor. Success!
This might seem like a
long and involved process to fix a bad fuel pump, but the problem
was never clear, as it mostly ran well, but just cut out some of the
time – and it cut out cleanly as if the ignition was turned off.
I now have a nice new fuel tank, new fuel hoses that are very hard
to access, and a repaired fuel pump. And no gas smell in the
car when I have a full tank.
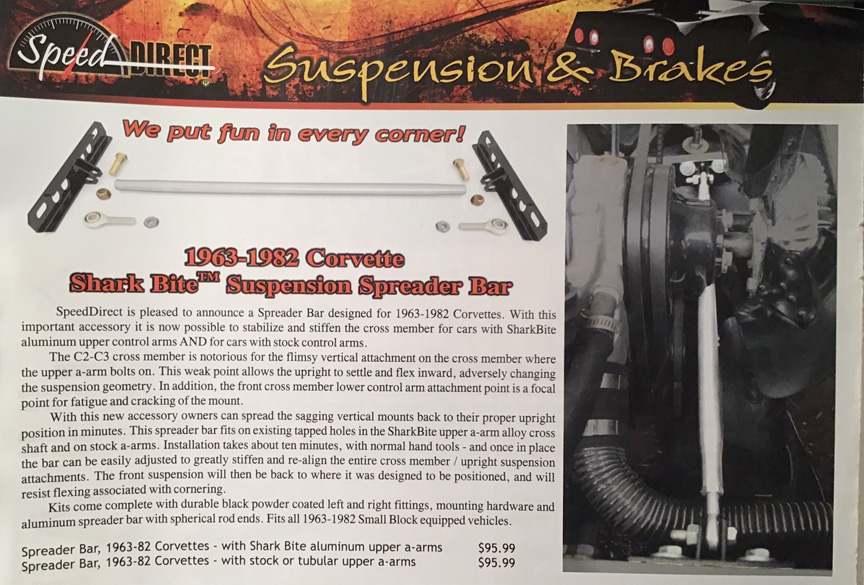
As explained in the image below, the towers that
support the upper front control arms sag inward upsetting front suspension
settings, and giving the car a soft feeling. The sagging takes place
over the life of the car, so it goes unnoticed. It does become
apparent when having the front suspension aligned because over time, fewer
and fewer shims are needed to give correct geometry. And as
anything that happens over time, the driving softness isn't apparent,
until you drive the same car with the spreader bar installed.
Speed Direct's magazine ad for their spreader bar
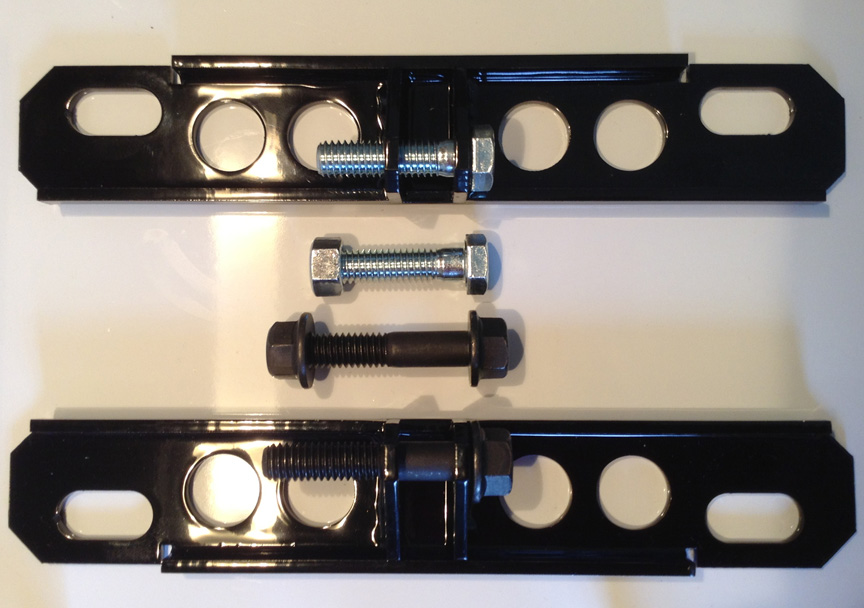
Here's a close up of the nicely powdercoated attachment plates. I
didn't like the cadmium plated bolts because the shank (unthreaded portion) of
each bolt was too short to go through both holes in the plate. I purchased
the black Grade 8 bolts with longer shanks.
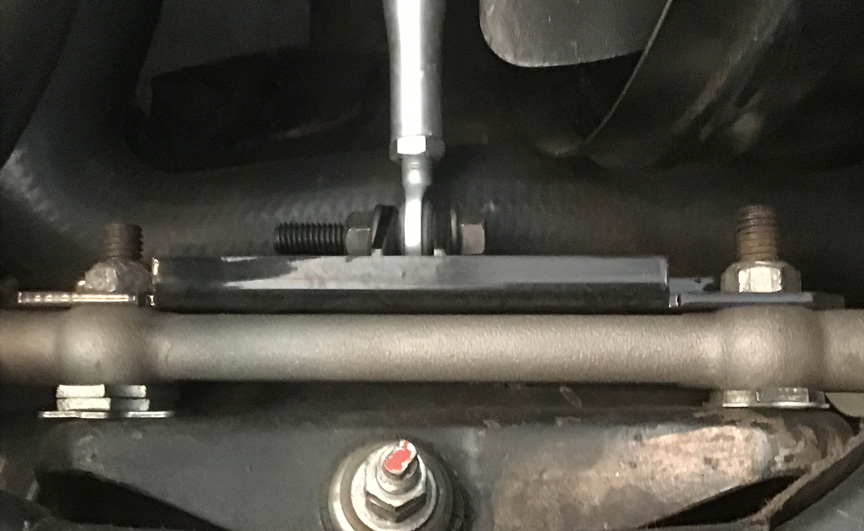
The right side bracket attached to the suspension. It's more than a
10 minute job, those large nuts have deformed threads to prevent
loosening, so each one must be turned with a wrench. Due to limited
space, a socket and retchet will not fit.
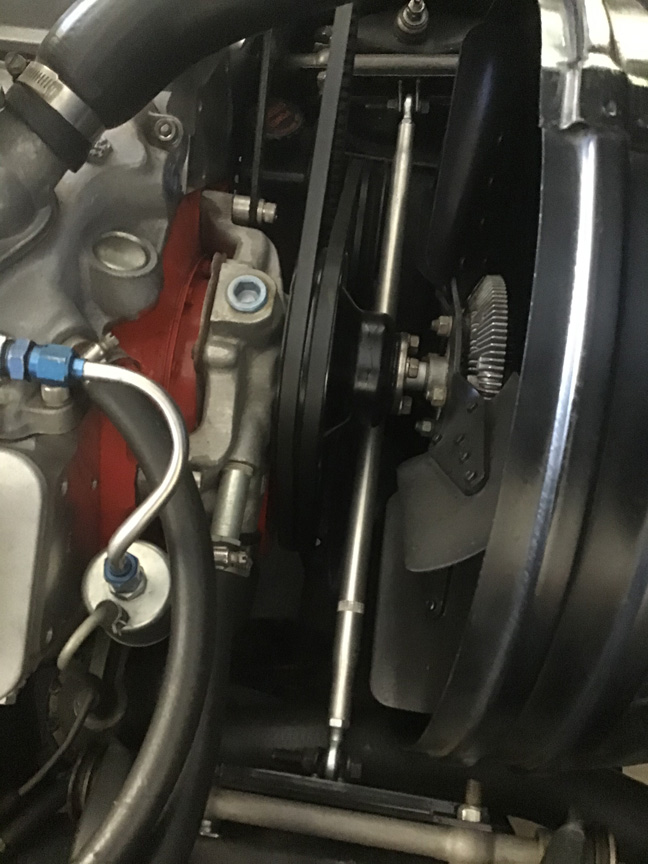
The installed spreader bar in my Corvette. Notice the fan clutch is
spaced forward approximately 1/8 inch with a small silver disk.
Before I installed the spacer, the fan would sometimes lightly kiss the
spreader bar. I would have liked to move the bar back away from the
fan, but the power steering pump pulley has two belt groves, preventing
the more reward placement. My friend Rob made the spacer for me that
fits the bolt pattern perfectly so the fan runs true, with no wobble and
no vibration.
It is amazing how much the spreader bar changed the handling feel of the
car. One can imagine the entire front of the car is carved out of a
single piece of steel, it is that much more rigid.
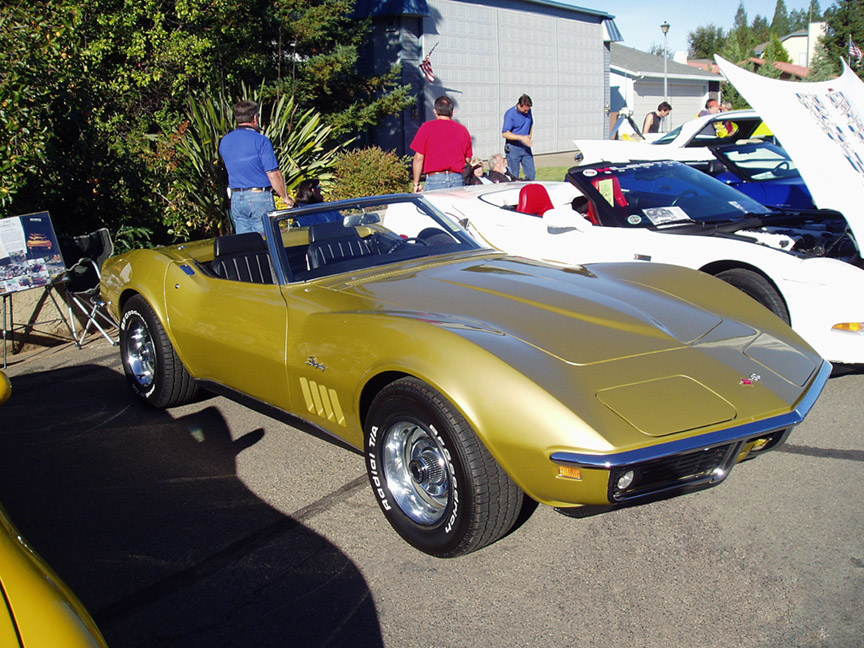
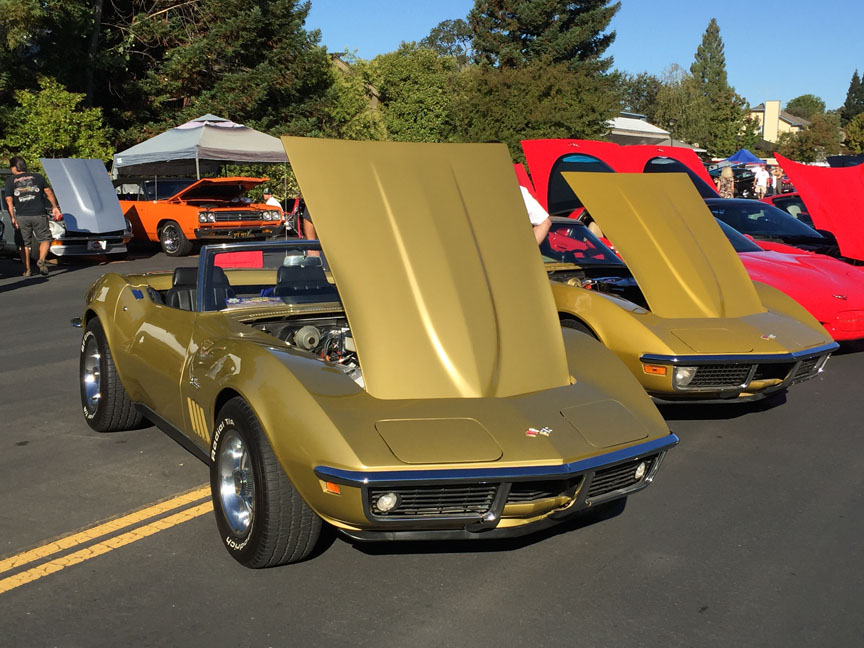
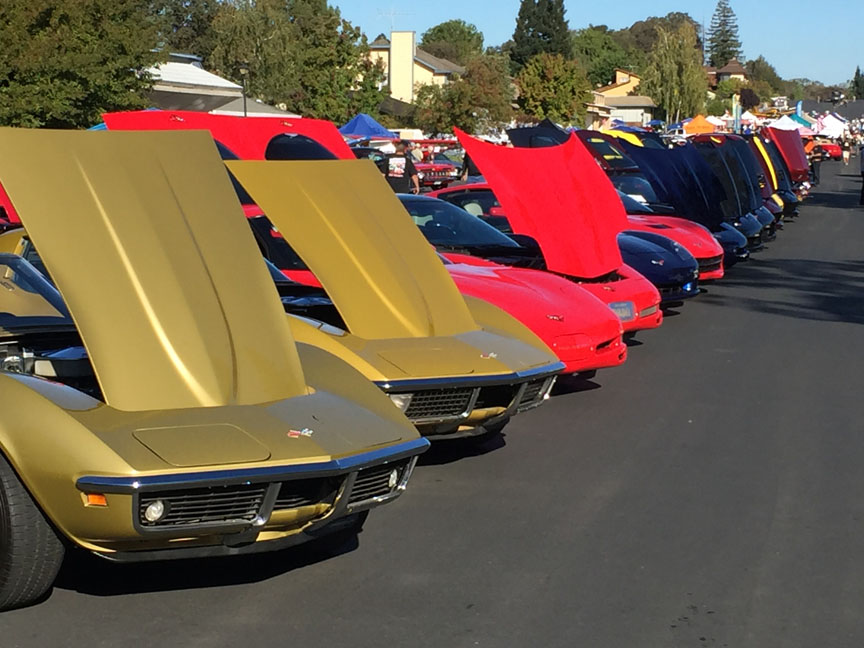
This is part of a lineup of Corvettes displayed by
the Cameron Park Corvette Club at the annual ShowN'Shine, September
30,2017.
Riverside Gold and War Bonnet Yellow - Many people think the cars are
the same color, but when side by side, it's obvious the colors are
very different.
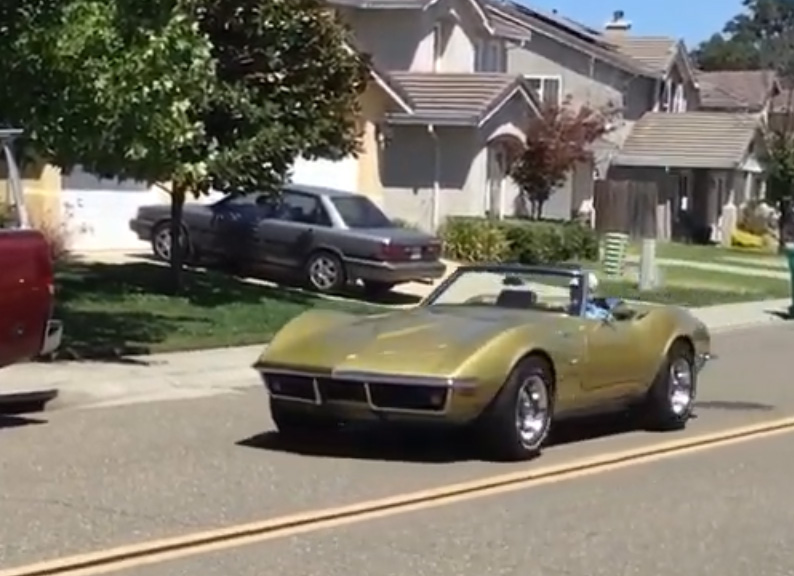
YouTube video of Ron driving the Corvette, 2019
- tap or click photo for video
This is a never ending story so keep coming
back!
The background color for this page was made from a small
section of a photo of the car's paint - Riverside Gold.
Return to Top of Page
This is HIDDENthis is the code to embed the above video, but it's not
working Keep trying
<iframe width="560" height="315" src="https://www.youtube.com/embed/AvUyGKpDxxA"
frameborder="0" allow="accelerometer; autoplay; encrypted-media;
gyroscope; picture-in-picture" allowfullscreen></iframe>